
Enter your search terms below.
vFlow – Installation of Cloud Service Provider Citrix ShareFile
Description of the article
steadyPRINT vFlow is able to store documents to the Cloud. For this purpose the configuration of a Cloud service provider via the steadyPRINT Center is necessary. This article describes the installation of Citrix ShareFile.
Solution
Registration of Citrix ShareFile Application (API Key)
For the registration of the application under https://api.sharefile.com/ a Citrix ShareFile account is required. After the login, a new application can directly be created via “Get an API Key”.
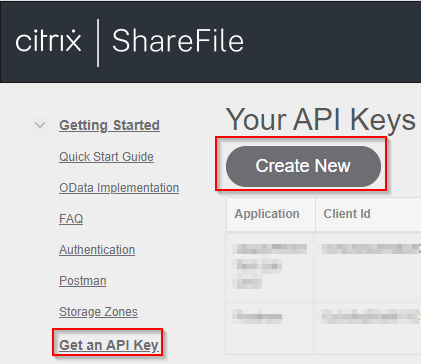
Figure 1: Registration of a new application
Now enter the name of the application and click „I don’t know or will not use a Redirect URI“. Then click „Generate API Key“.
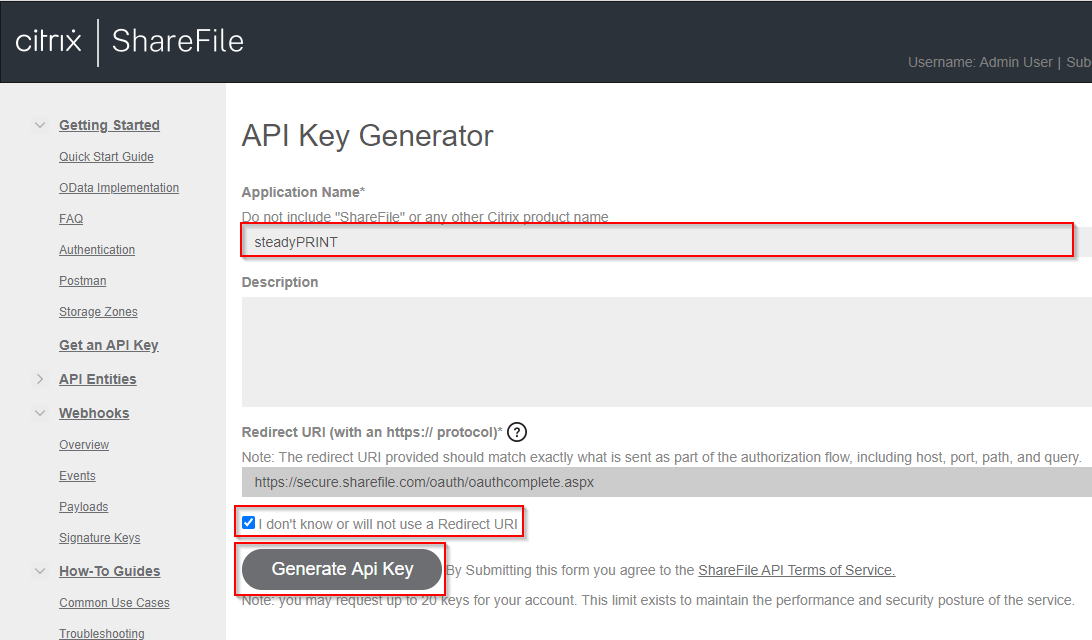
Figure 2: Entry of application name and pre-defined Redirect URI
After the successful creation, the application is immediately available. For the further configuration Client ID, Client Secret and Redirect URI are necessary.
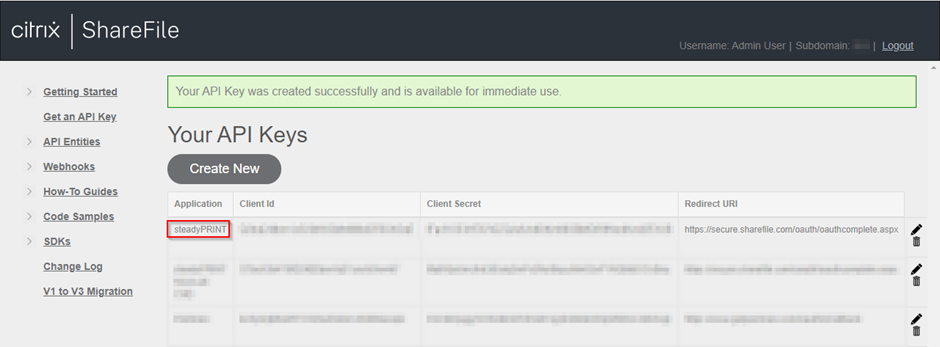
Figure 3: Creation of the application completed
The registration of the application for a default case is now completed. Depending on your organization, individual configuration steps may differ and/or further settings may be necessary.
Configuration Citrix ShareFile Cloud Provider in steadyPRINT
In order to integrate Citrix ShareFile, change to the steadyPRINT Center, go to File > Settings > vFlow Cloud Provider and click „Add“. Now select “Citrix ShareFile” in the window for the configuration of the Cloud Provider and enter a name first.
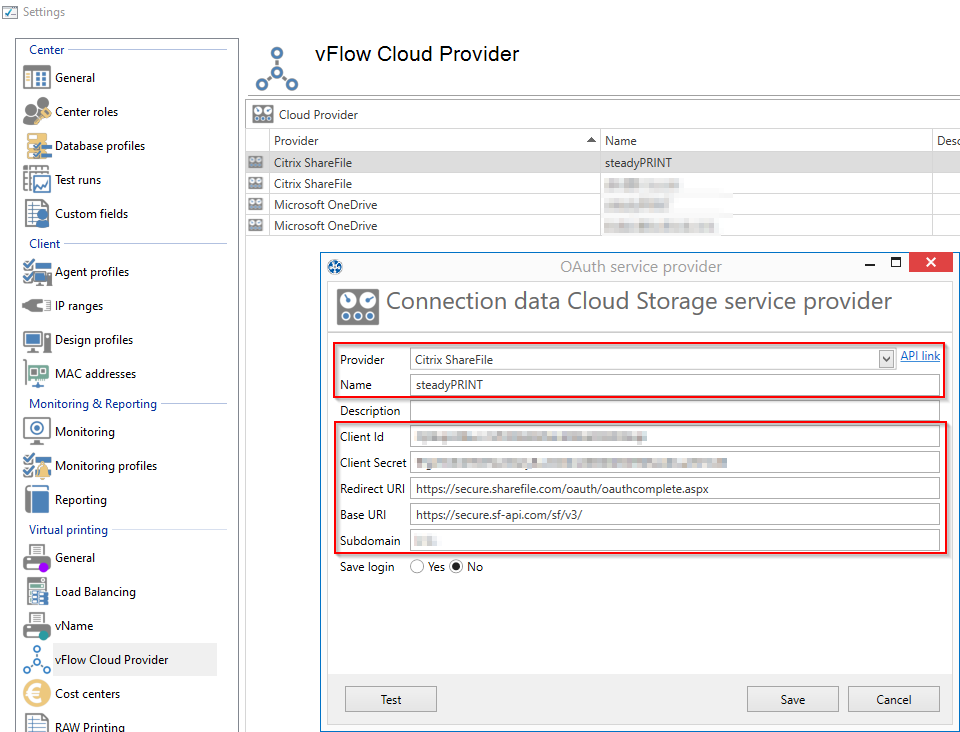
Figure 4: Configuration Cloud Provider
Now copy the Client ID, Client Secret and Redirect URI from Citrix ShareFile (see figure 3: Creation of the application completed) and paste it to the respective fields. Moreover, indicate https://secure.sf-api.com/sf/v3/ as the Base URI.
In order to avoid that the user has to indicate the sub domain during registration, it can be stored in the field with the same name.
Via the button “Test” you can verify whether the settings are correct. For registration purposes a Citrix ShareFile account is required so that authentication can be performed. As soon as this process is completed, a respective message is displayed. In case of an error, please check the error message and the stored settings if required.
Note: For a correct access to the Cloud Drive (https://[subdomain].sharefile.com/), it has to be accessed once in advance.
Application Citrix ShareFile in vFlow
Create a new Workflow and insert the action “Store to cloud” via drag & drop which will be followed by the selection of the Cloud Provider defined above.
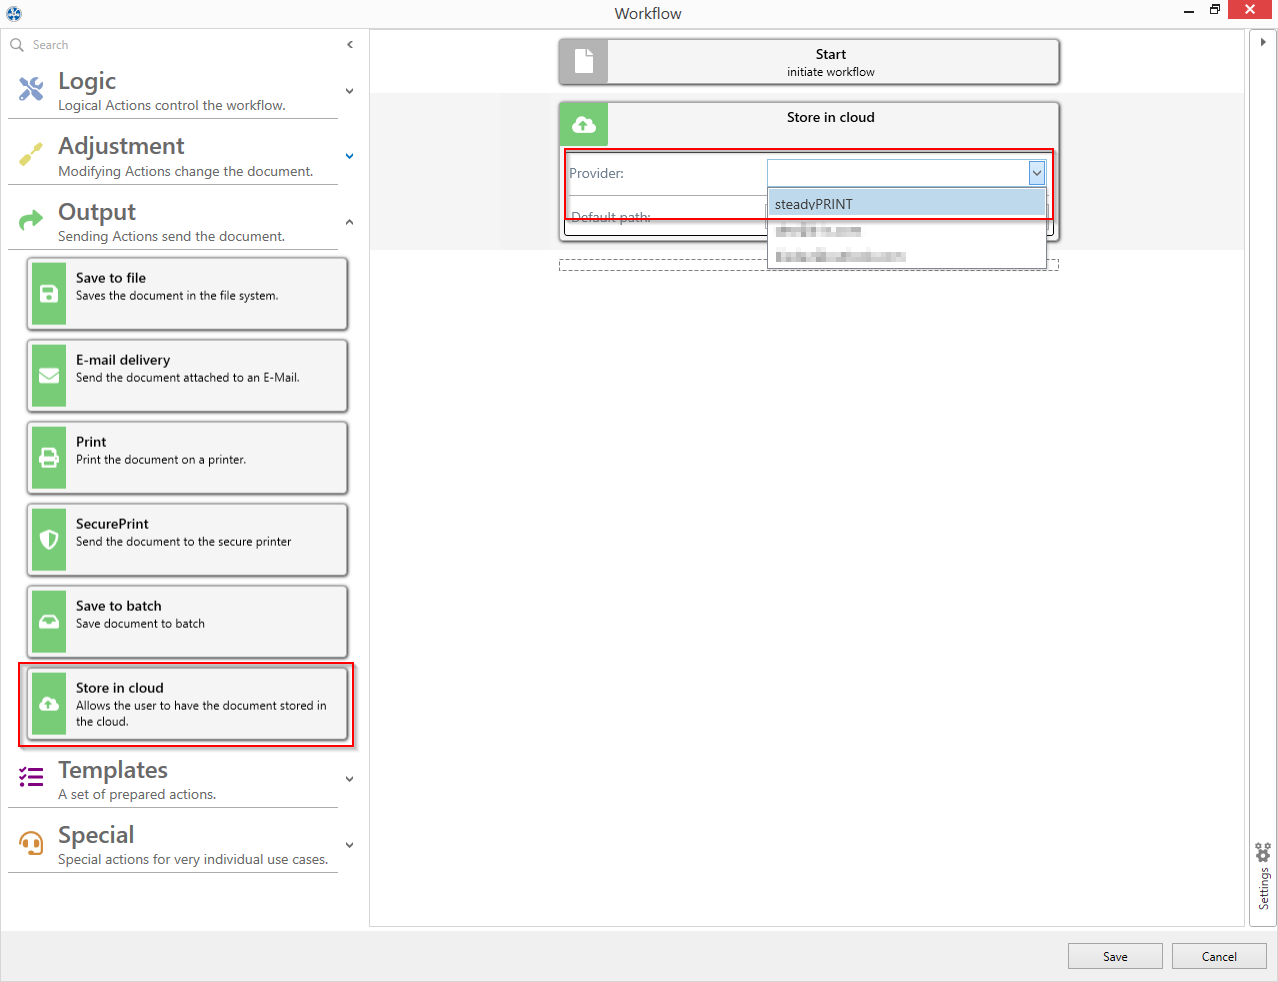
Figure 5: Selection Cloud Provider
Finally, the workflow can be provided and carried out as usual. The end user has to specify his/her account and password in order to finally store the document to the desired location in the cloud.
Note: If you do not want the user to enter his/her password each time the process is carried out, select “Save Login” in the settings for the Cloud Provider.
Dependencies
- Setting Citrix ShareFile Application
- steadyPRINT CAL for vFlow
Related Articles
https://api.sharefile.com/
ID: 20085 | Zur deutschen Version
