Guest Printing(Last update of this topic: 10-17-2017) |
  
|
(Last update of this topic: 10-17-2017)
Guest Printing(Last update of this topic: 10-17-2017) |
|
steadyPRINT Guest Printing enables companies to share printers with guests of the company or employees who do not have a permanent or even variable workstations.
As an administrator, you can specify in the steadyPRINT Center which printers are to be shared for which locations with regard to guest printing. The use of IP filters is supported by steadyPRINT Guest Printing.
The user can upload documents via a website and print them on the shared printer.
Checklist for the configuration of guest printing
| • | Create application pool with domain user |
| • | Create application site (directory, port, DNS) |
| • | Sharing of folder „Visitor“ |
| • | Adjustment of the file uploadpath.xml |
| • | Sharing the shared folder for storing the print jobs |
| • | Share printer as guest printer in the steadyPRINT Center (attention with IP filters) |
| • | Create VPD assignment for the user so that vPrinter is automatically installed |
| • | Installation of the rendering programs (Foxit PDF, Libre Office) |
| • | Store installed program as default program for the application pool User |
| • | Start the steadyPRINT Agent with the user |
| • | .Log file to shared folder |
| • | Start site in browser |
| • | Upload |
| • | Select printer |
| • |
| • | Check .logfile in case of an error |
Configuration of Guest Printing
steadyPRINT Guest Printing requires user rights which the default user "IIS_IUSR" does not have for websites. Therefore, you have to use a domain user.
Configuration of the Application Pool
Start your IIS manager and create a new application pool. By clicking the button Application pool with subsequent right-click, a new application pool can be created. Figure IIS Manager - Application Pool

Figure 178: IIS Manager - Application Pool
Select .Net v4.0 for „.Net CLR version“ and enter a name for the pool as for example "GuestPrintingPool". Enter the option "integrated" for "managed pipeline mode".
Having created the application pool, click the button Extended settings and enter a user name with the related password under "Identity". Guest printing will be run in the selected user context. The user has to be able to access data, store print jobs and write .log files. Figure IIS Manager - Application poor extended settings

Figure 179: IIS Manager - Application poor extended settings
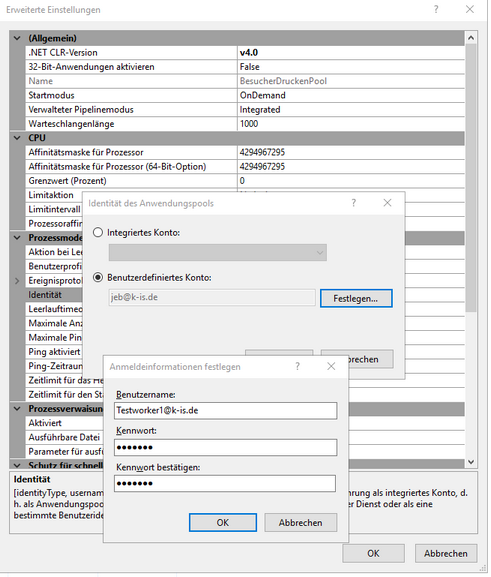
Figure 180: IIS Manager - Application pool extended settings - enter user
Moreover, the user has to be able to accept printer assignments. You can either create a user for guest printing in your Microsoft Active Directory or use an existing user.
Configuration of the Site and Sharing
To integrate the installed steadyPRINT files, select "Sites" and "Add website" (e.g. to integrate the installed steadyPRINT files choose "Sites“ and „Add Website“ (e.g. right-click).
Select the created application pool and enter a name for the site.
Select the directory where steadyPRINT has been installed and select the folder "Visitor".
Select the desired port and enter a name for the website. Figure Windows - Sharing the folder for the user
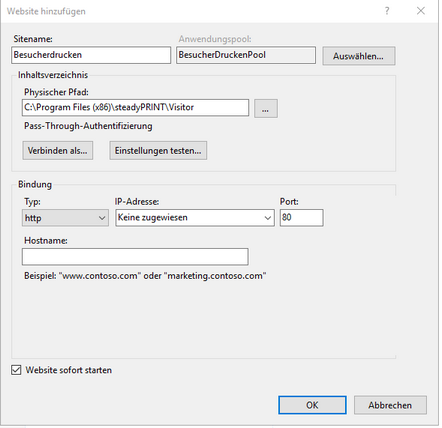
Figure 181: Windows - Sharing the folder for the user
Confirm with OK.
Select the Windows Explorer and share the folder "Visitor" of the steadyPRINT installation with the user selected in the application pool. Figure Windows Explorer C:\Program Files (x86)\steadyPRINT\Visitor\App_Data\Uploadpath.xml
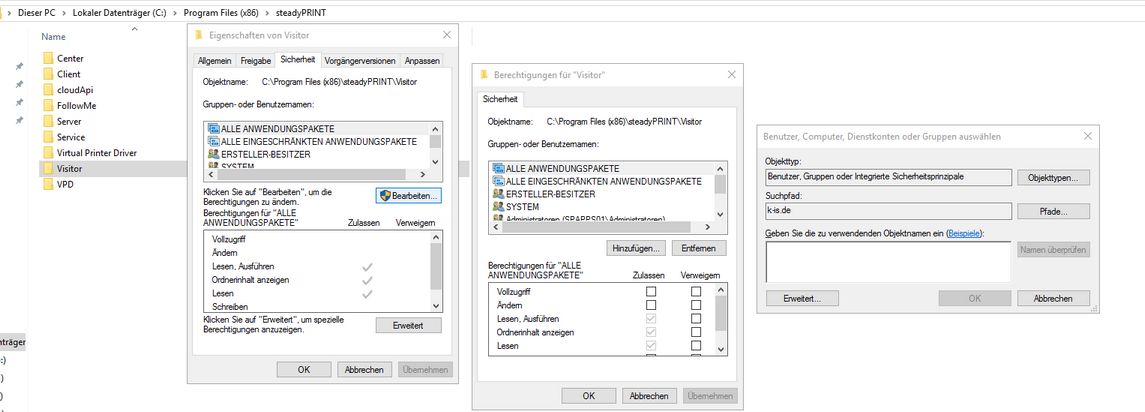
Figure 182: Windows Explorer C:\Program Files (x86)\steadyPRINT\Visitor\App_Data\Uploadpath.xml
Configuration of the File Uploadpath.xml
The file „Uploadpath.xml“ is located in the installation directory of steadyPRINT under Visitor/App_Data/Uploadpath.xml. Figure Windows Explorer C:\Program Files (x86)\steadyPRINT\Visitor\App_Data\Uploadpath.xml
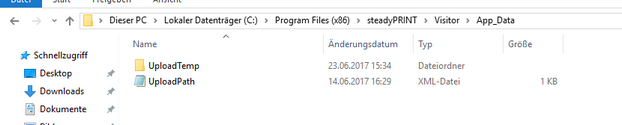
Figure 183: Windows Explorer C:\Program Files (x86)\steadyPRINT\Visitor\App_Data\Uploadpath.xml
Select a shared folder under <SelectedSharedFolder> </SelectedSharedFolder> to which the print jobs are to be stored during the printing process. The folder has to be accessible for the steadyPRINT Service service. Figure Center - Share printer as guest printer
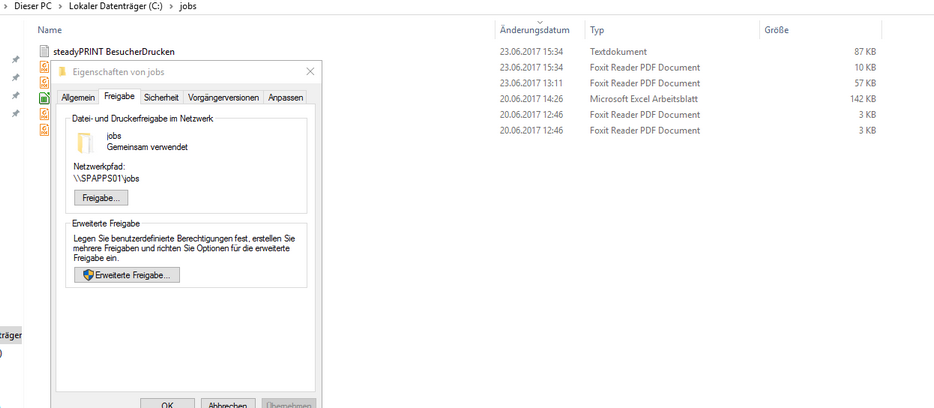
Figure 184: Center - Share printer as guest printer
<MaximumFileSizeMb>10</MaximumFileSizeMb> specifies the maximum size of files in megabyte available for the user upload.
<AllowedFileExtensions>.pdf,.xml,.txt,.docx,.xls,.xlsx,.pptx,.doc</AllowedFileExtensions> determines which file formats can be uploaded by the user. An additional file suffix can be inserted by adding "file ending" to the list, separated by a comma. (,.txt). In the same way, file suffixes can be removed.
The <PdfAliveTimer>60</PdfAliveTimer> specifies the maximum number of seconds a document may be rendered before the process is terminated. Unfortunately, PDF programs such as Foxit Reader do not close automatically after the process has been terminated.
Adjust the value in case the Foxit Reader is started but no documents are printed. This feature serves as a guarantee and has to be adjusted only if the <MaximumFileSizeMb> reaches high values.
Activate Guest Printers in the steadyPRINT Center
A printer can be shared as a guest printer with only one click. Select the desired printer in the tree and click the tab Settings "Share as guest printer". The printer is now active as guest printer. Figure Center - Share printer as guest printer
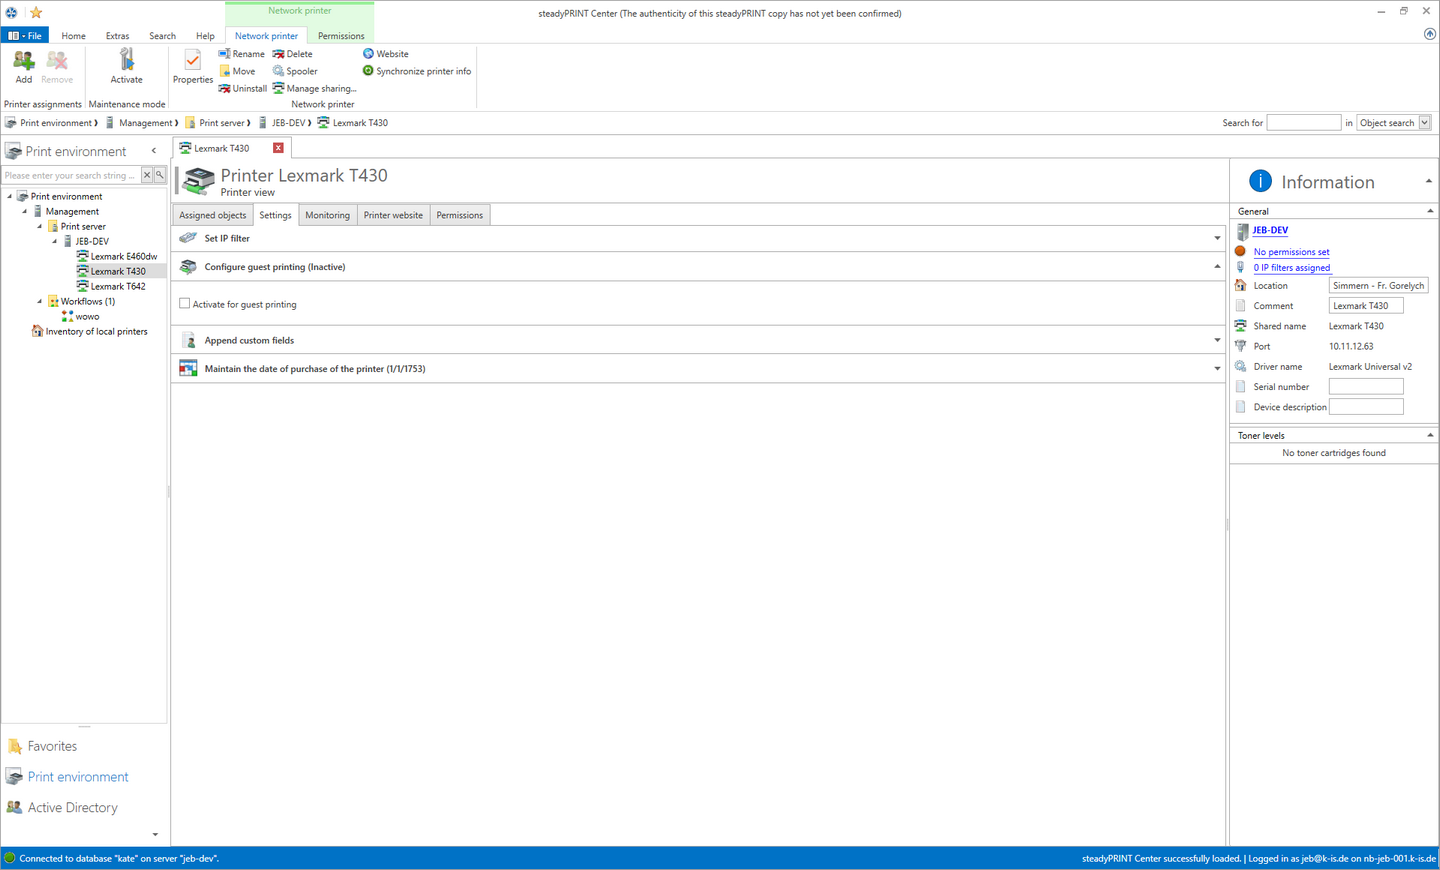
Figure 185: Center - Share printer as guest printer
Create vPrinter Assignment for the User in the steadyPRINT Center
Create a user assignment in the Center (see chapter Printer Assignment) so that the vPrinter is installed for this specific user. The vPrinter is required for the uploaded files to be printed on the target printer.
Installation of the Programs for Rendering the Print Jobs
To make guest printing work with all possible file formats, programs that create a file format from the uploaded files have to be installed on the server. The printer or printer driver must be able to understand the file format and to print the respective files.
After the installation, the program has to be selected as the default program for the desired file format. Many programs offer this option already during the installation.
All file formats included in the standard for the steadyPRINT Guest Printing can be found in the file uploadpath.xml in the entry <AllowedFileExtensions>.pdf,.xml,.txt,.docx,.xls,.xlsx,.pptx,.doc</AllowedFileExtensions>.
Office files can be rendered with LibreOffice as of version 5 (Server 2008R2, 2012R2, 2016)
Office files can be rendered with OpenOffice as of version 4 (Server 2012R2)
Pdf files can be rendered with Foxit Pdf Reader as of version 8 (Server 2008R2, 2012R2, 2016)
Text files can be rendered with Notepad (Server 2008R2 ,2012R2, 2016)
Different servers or file formats have not been tested but can be submitted later on request. Select the user on your server and set the desired program as default program for processing the desired file format.
Starting the Agent with the Appool User
Start the steadyPRINT Agent under the user context you would like to use for the steadyPRINT Guest Printing so that the steadyPRINT vPrinter will be installed for the user.
Logging of Guest Printing
The logging for the steadyPRINT Guest Printing can be performed analogous to the extended logging (see entry to Extended Logging) with the exception that the output path for the log file must not be stored in the %Appdata% of the user as the application pool user does not have the rights to write there.
Start Guest Printing
Normally the site is started automatically after the configuration by the IIS. If this should not be the case, you can also start the site manually. Figure IIS Manger - Start the application
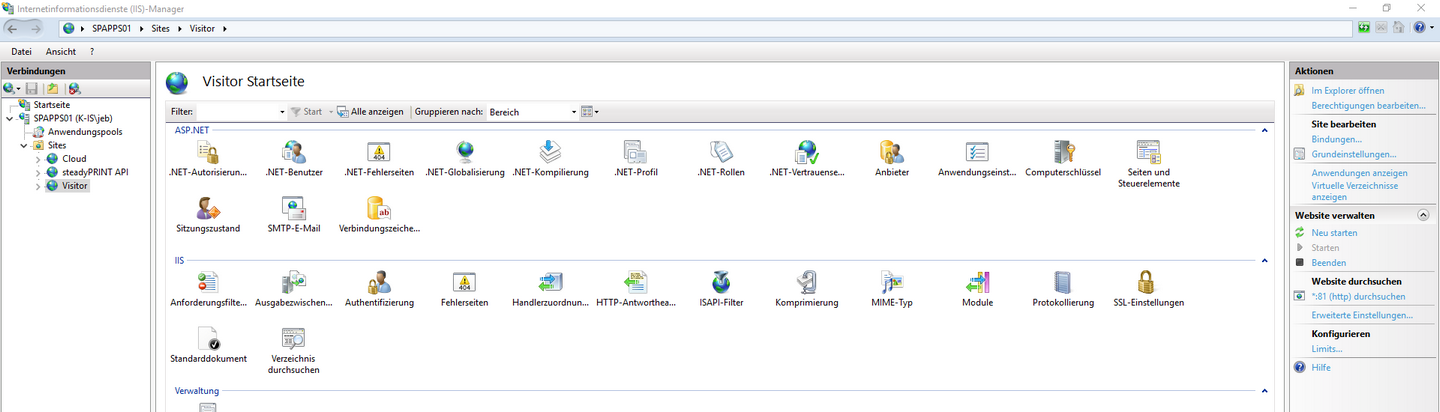
Figure 186: IIS Manger - Start the application