
Enter your search terms below.
vFlow – Setup of cloud provider K-noxFiles
Description of the problem
steadyPRINT vFlow has the ability to store documents in the cloud. This requires the configuration of a cloud provider via the steadyPRINT Center. This article describes the setup for K-noxFiles.
Solution
Configuration K-noxFiles Cloud Provider in steadyPRINT
In order to integrate K-noxFiles, first start steadyPRINT Center, navigate to File > Settings > vFlow Cloud Provider and click on “Add”. In the window for configuring the cloud provider, select “K-noxFiles” and enter a name.
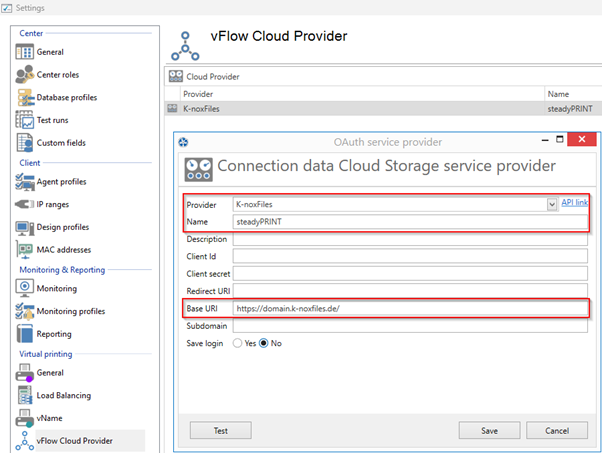
Figure 1: Configuration Cloud Provider
Now enter the address of your K-noxFiles server as the base URI.
You can check whether the settings are correct by clicking the “Test” button. To log in, a user must exist and the steadyPRINT Agent must be running.
Authentication now takes place in the browser. Once this is complete, please confirm this in the pop-up window. You can now close the browser page.
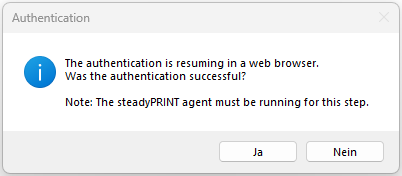
Figure 2: Confirmation after successful registration
If an error occurs, please check the error message and, if necessary, the stored settings.
Using K-noxFiles in vFlow
Create a new workflow and drag the “Store in cloud” action into it. Then select the cloud provider defined above.
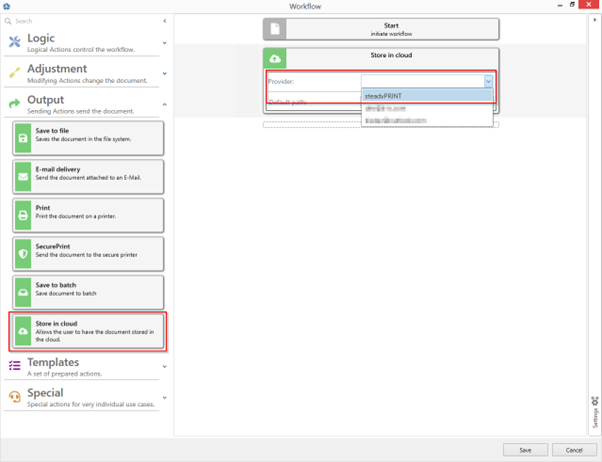
Figure 3: Selection Cloud Provider
You can then deploy and execute the workflow as usual. When executing the workflow, the end user must now authenticate themselves on the K-noxFiles server in order to finally store the document in the cloud at the desired location.
Note: If you do not want the user to have to re-enter the password each time they run the program, select “Save Login” in the settings for the cloud provider.
Dependencies:
- steadyPRINT CAL for vFlow
ID: 31144 | Zur deutschen Version
