View(Last update of this topic: 07-14-2017) |
  
|
(Last update of this topic: 07-14-2017)
View(Last update of this topic: 07-14-2017) |
|
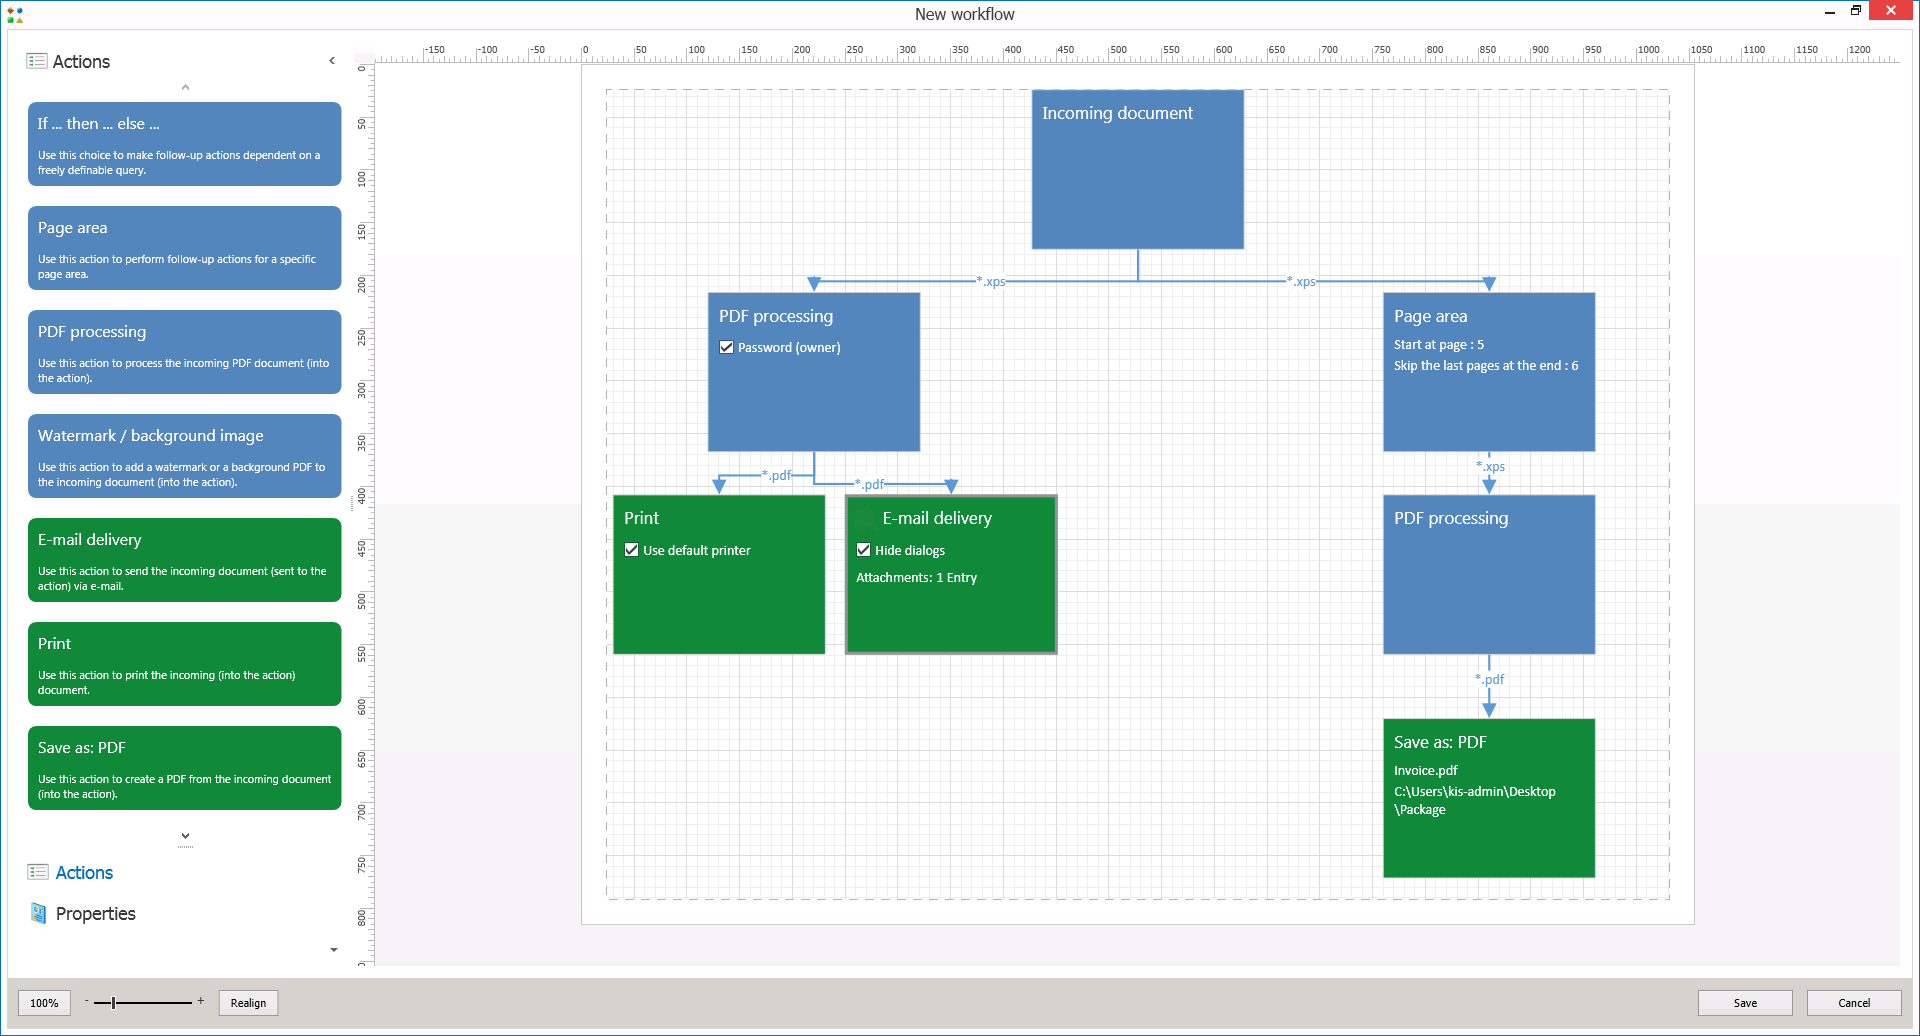
Having confirmed the button New Workflow, the window for creating the workflow opens. The following figure Create Workflow shows a workflow with different actions.
Figure 73: Create Workflow
All actions that are available for a workflow are listed on the left side of the view. The right part of the window shows the display and working area (also called ViewPort). In the lower part of the windows, the zoom elements and the default buttons for Save and Close are arranged.
The tile Incoming document represents the original document for the workflow. This is the point of origin for all following actions. An action for the document processing can be added by Drag&Drop. It should be noted that the new element always has to be released on the previous element. To run a deletion, the desired action is to be marked and deleted by pressing the DEL-key on the keyboard.