Printer Assignment(Last update of this topic: 02-15-2021) |
  
|
(Last update of this topic: 02-15-2021)
Printer Assignment(Last update of this topic: 02-15-2021) |
|
Printer connections are generated in steadyPRINT through the assignment of Active Directory objects (Users, Computers, Groups and Organizational Units) from steadyPRINT Center’s User and Computer-Administration. All objects stem from Windows‘ Active Directory, which is mapped in an analog structure. If assignment changes take place, these immediately take effect on the workstations and clients on which the steadyPRINT Agent has been installed. They are continuously notified of any changes made. In this way, for instance, an adjustment of the printer assignments for a specific user leads to the communication of this fact to the user and also to an updated configuration of printer connections.
To assign objects to a printer, first select the printer in the tree view and then select Add Printer Assignment in its context menu or alternatively via the ribbon of the selected printer. The figure - steadyPRINT Center - user and computer administration shows the User and Computer Administration view in which users, computers, groups and organizational units from their Active Directory are available for the printer assignment. To create a printer connection, you can add an object to be administered – the user Mrs. Herzog on the upper right side, for instance - via the Add button to the assignment list. Once this action is completed, the log in item will be found in the selected printer’s listing.
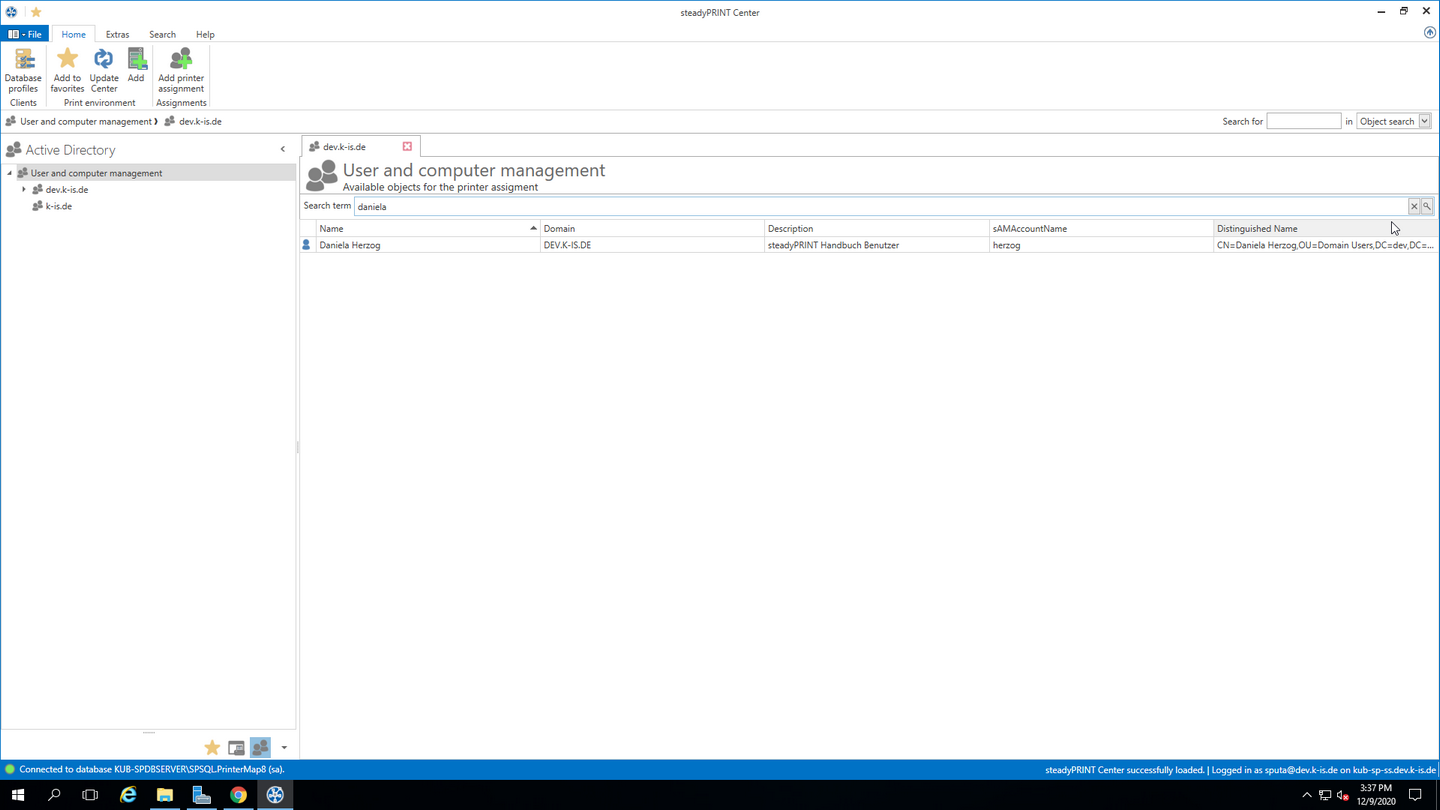
Figure <%HMFIGURECOUNTER%: steadyPRINT Center - user and computer administration
Note |
Assignment of Nested Groups |
|
The evaluation of nested groups and recursive organizational units is disabled by default. For further information please refer to Nested Groups. |
Note |
Import of Printer Assignments via CSV File |
|
In steadyPRINT, the printer assignment can also be realized via CSV file. This way, you can, for example, simply import your printer assignments including default printer from an inventory to steadyPRINT. The procedure is described in chapter Import of printer assignments from CSV file. |
Assignment via MAC address
Since version 7.0.1, steadyPRINT supports the assignment of printers based on a MAC address. For this purpose, the MAC address must first be collected via the steadyPRINT Center (ribbon Extras > MAC-Adressen). The printer can then be assigned to a MAC address, analogous to AD objects. To do so, select Create printer assignments in the context menu of the desired printer. In the following window, switch to the tab MAC addresses and select one or more of the previously created MAC addresses for your printer assignment.
Note |
Prerequisites |
|
The assignment of MAC addresses is supported for - Windows Workstations with a local session and - VMware View Client. |
Adding Printer Connection
steadyPRINT offers the possibility to create different assignment types (see chapter Overview Assignment Types). The administrator selects the type when creating the respective assignments.
For this purpose, please select one of the following two methods:
| 1. | Create via ribbon entry |
| 2. | Create via context menu of the assignment view. To do this, please proceed as follows: (see figure steadyPRINT Center - Adding different types of assignment) |
| 2.1. | Select the filter of the assignment type that is to be created. |
| 2.2. | Open the context menu within the table. |
| 2.3. | Select "Add" |
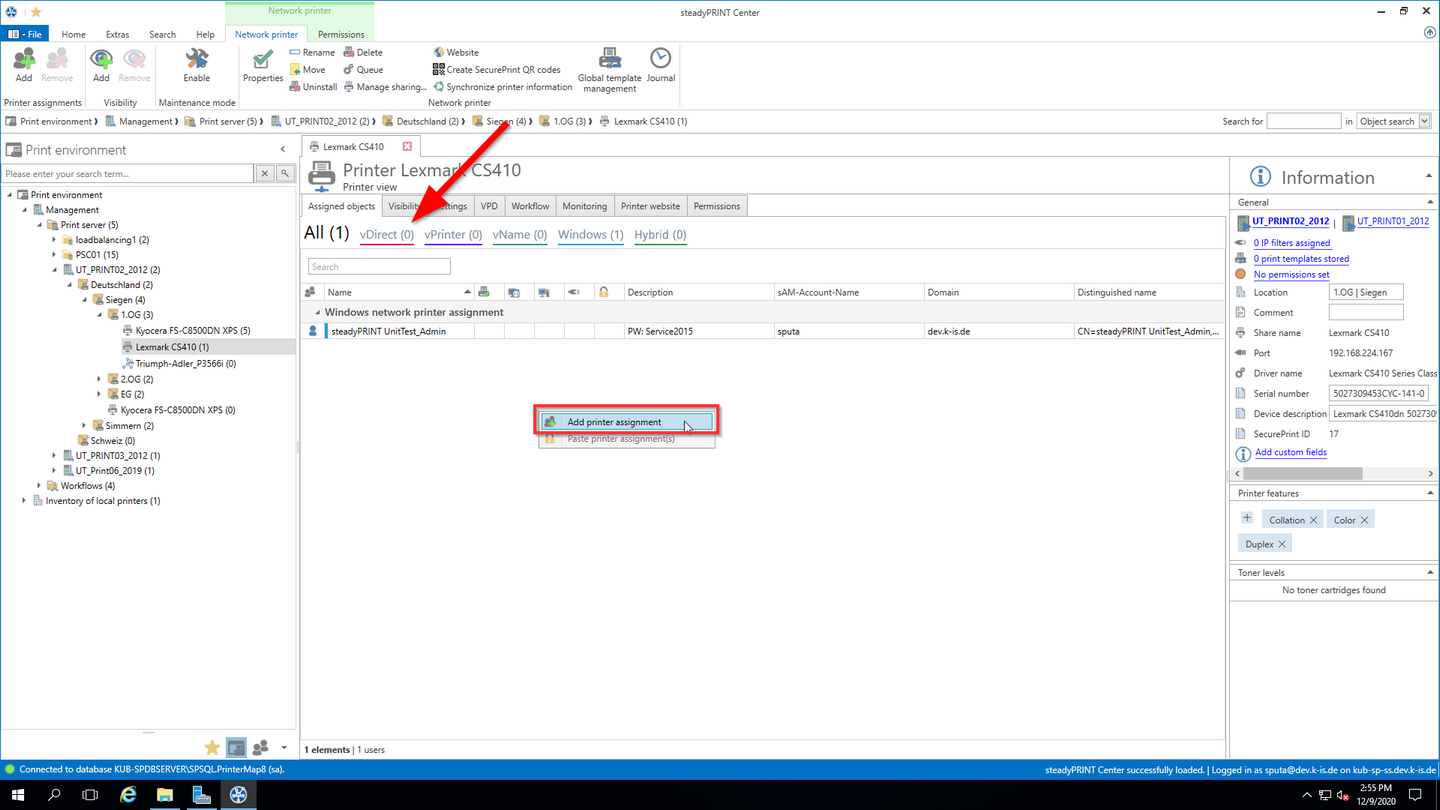
Figure 22: steadyPRINT Center - Adding different types of assignment
Sharing and Blocking Printers
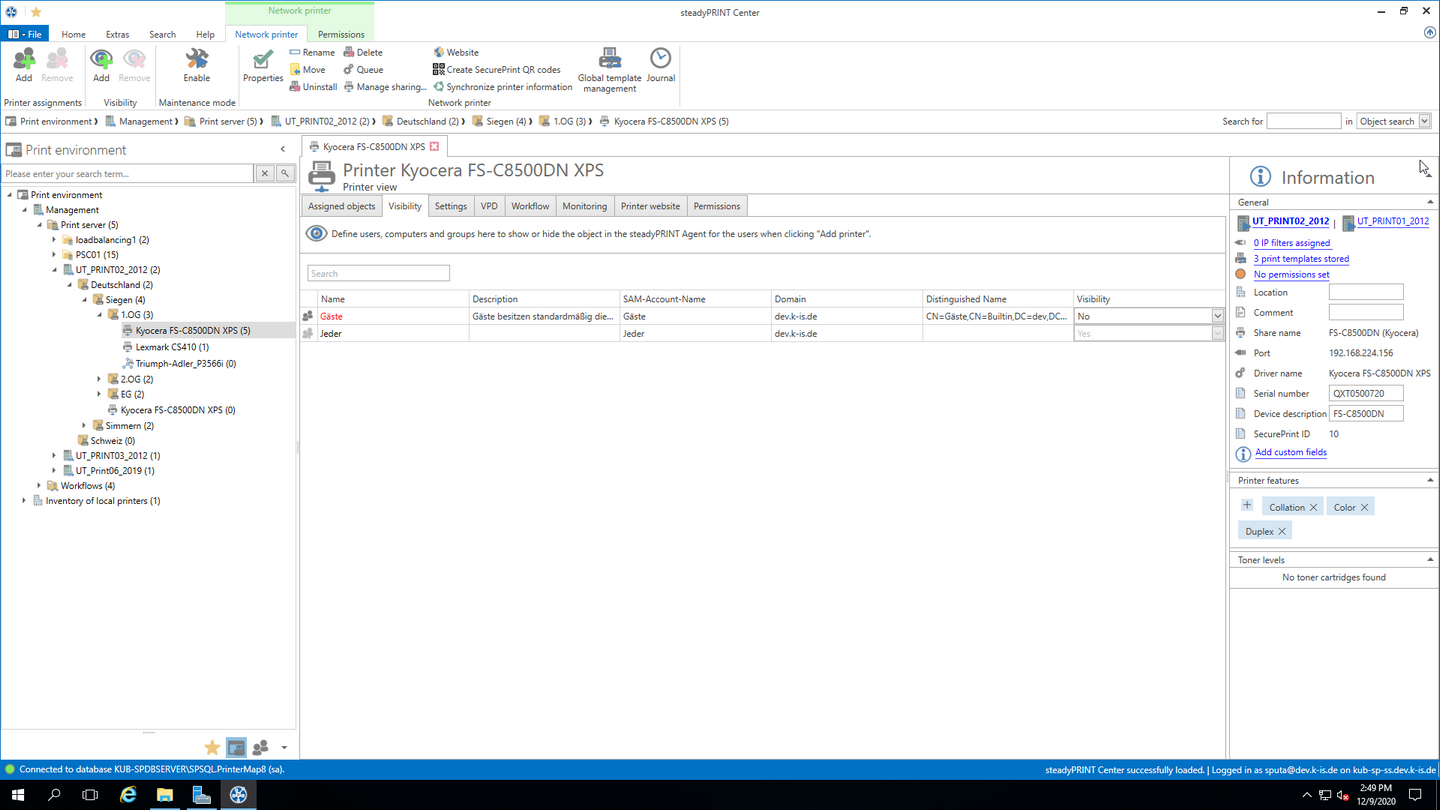
Printers administered with steadyPRINT can be shared and blocked in a precise, fine-tuned way by means of the Active Directory objects at your disposal (see figure - steadyPRINT Center - connection settings for printer – the first check mark). By default, all assignments are enabled. It is possible to configure the share either by using the printer display or via the context menu of the respective object.
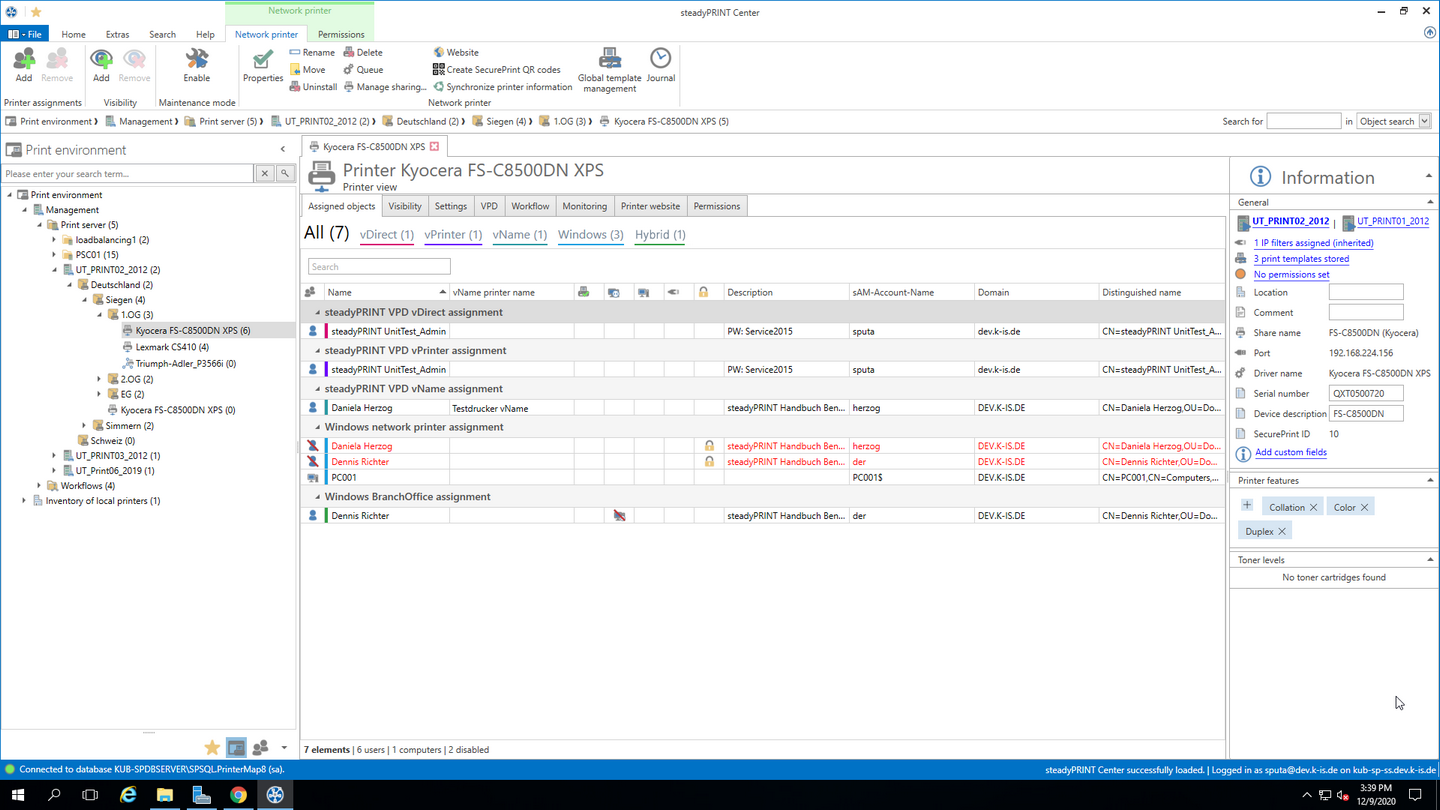
Figure <%HMFIGURECOUNTER%: steadyPRINT Center – connection settings for printer
Blocking a printer with steadyPRINT means that it is no longer connected to the user, the computer or the group. Furthermore, it is not possible for the user to add it with the steadyPRINT Agent.
In addition, you have the possibility to share blocked printers with individual users, computers and/or groups. In this context, it is necessary to pay attention to the priority of the respective assignments:
| • | User = Priority 1 (high), |
| • | Computer = Priority 2, |
| • | Group = Priority 3 and |
| • | Organizational unit = Priority 4 (low). |
Tip |
Sorting Assignments by Priority |
|
Use the first column of figure - steadyPRINT Center - Connection Settings for Printer - Connection Settings for Printer in order to sort the assignment by its priority. |
The following scenarios describe the behavior in various constellations with the user Dennis Richter being in the group Domänen-Benutzer and working on computer PC001.
Scenario 1
Figure - steadyPRINT Center - scenario 1 for assignment shows the assignments of the printer Brother MFC-660CN for the user Dennis Richter, the computer PC001 and the group Domänen-Benutzer.
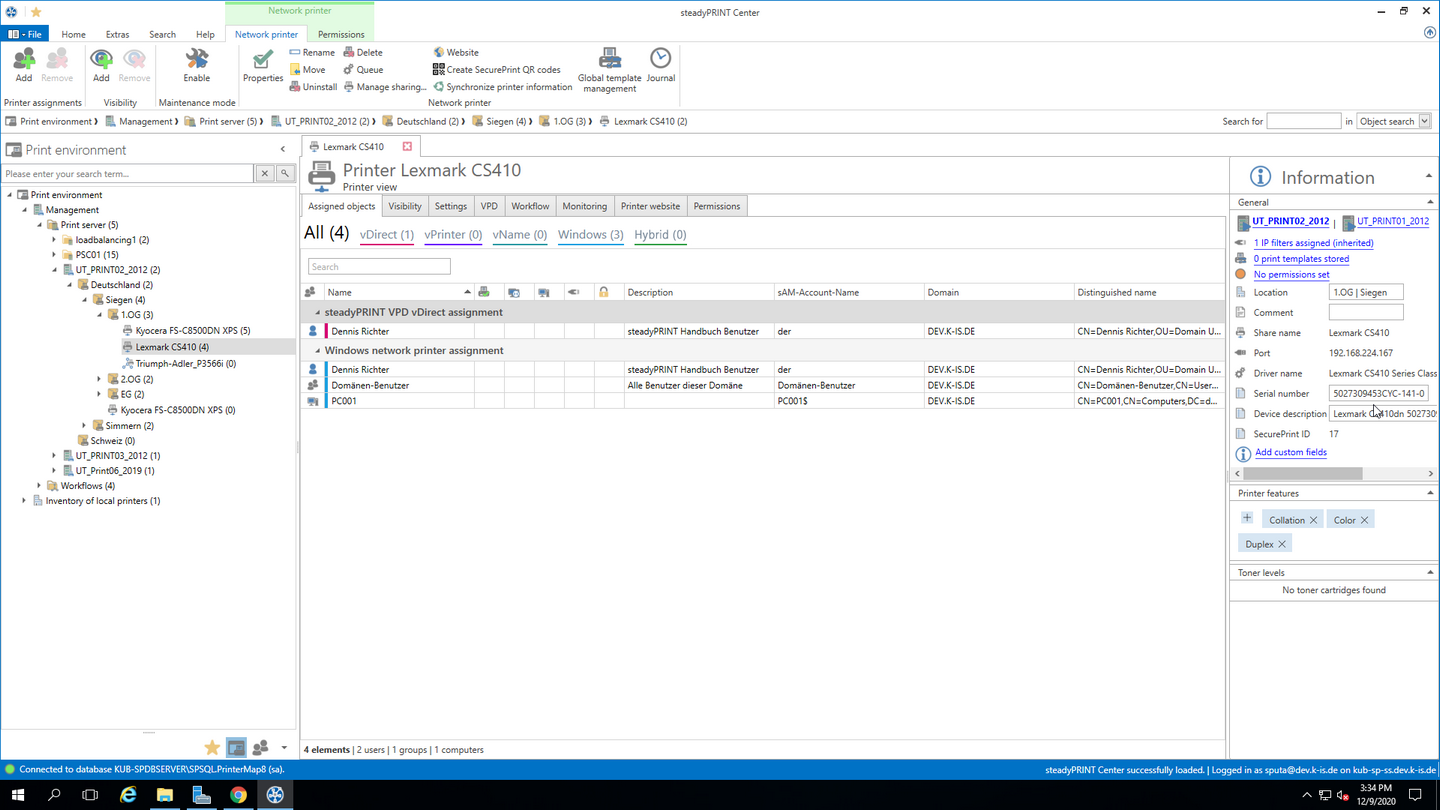
Figure <%HMFIGURECOUNTER%: steadyPRINT Center - scenario 1 for assignment
Scenario 2
Figure - steadyPRINT Center - scenario 2 for assignment shows the assignment of the printer Brother MFC-660CN for the user Dennis Richter and the computer PC001. This printer is not available to the other users of the group Domänen-Benutzer.
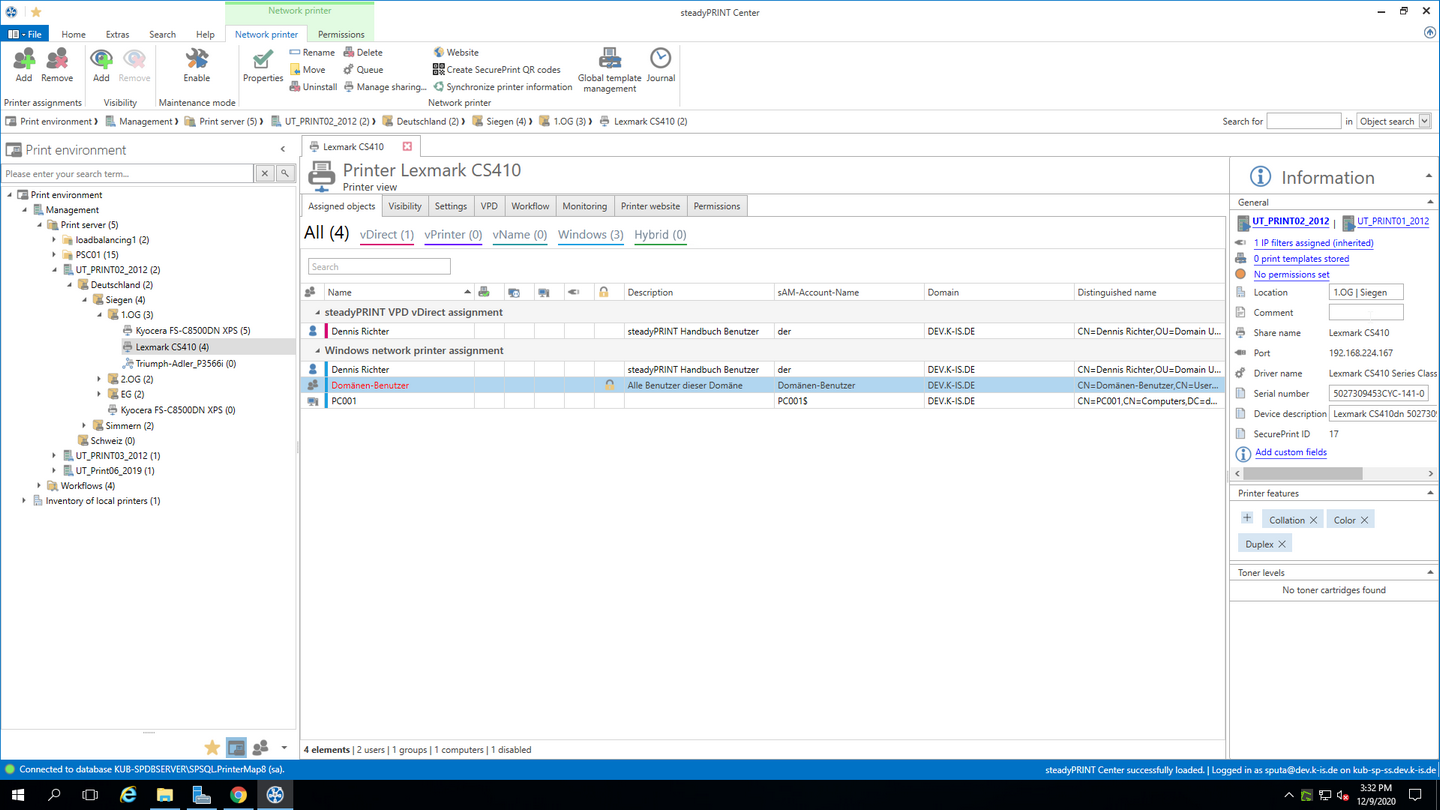
Figure <%HMFIGURECOUNTER%: steadyPRINT Center - scenario 2 for assignment
Scenario 3
Figure - steadyPRINT Center - scenario 3 for assignment shows the assignment of the printer Brother MFC-660CN for the group Domänen-Benutzer. The user Dennis Richter as well as all other users working on computer PC001, do not have access to the printer.
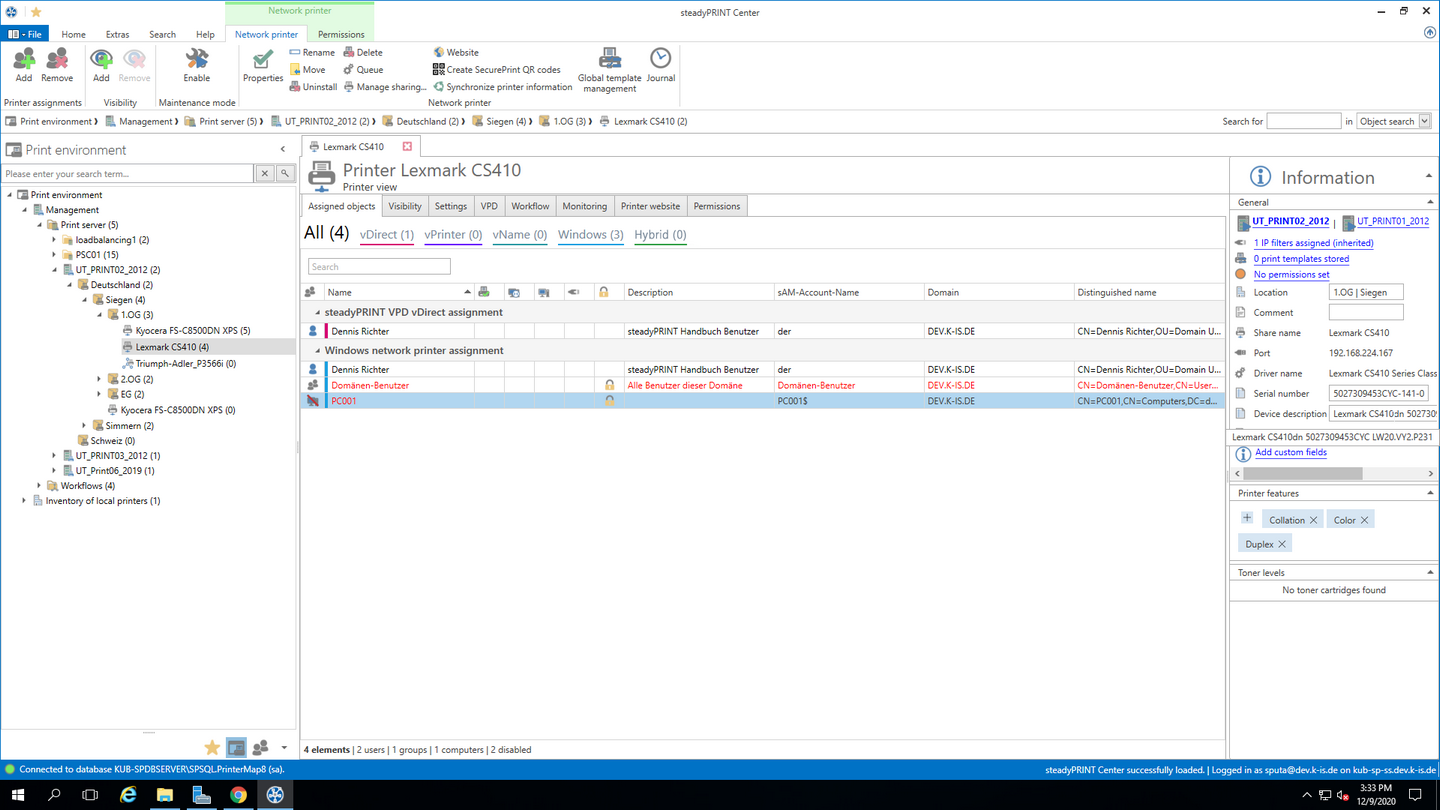
Figure <%HMFIGURECOUNTER%: steadyPRINT Center - scenario 3 for assignment
Tip |
Deleting Manually Created Printer Connections |
|
Using Settings under Agent Profile, you can select whether or not the printer connections not being administered by steadyPRINT are to be deleted from the steadyPRINT Agent at startup. With this, it is possible to automatically remove printers that were added manually by the user via the Windows printer directory. |
A further option to show or hide printers to users is the configuration of visibilities.
Connecting Printers on Terminal Servers and/or Workstations
For every Active Directory object in steadyPRINT, you can decide whether the assigned printer should be specially connected to a terminal server and/or a workstation (see figure - steadyPRINT Center - connection settings for printer - column 3 and 4). This allows a dedicated and differing printer connection for the user in the local as well as a terminal server session.
In order to use this function, just double-click the respective cell in the table.
Setting IP Filters
An IP filter allows providing printers for selected IP address areas. If the user’s Client does not have an IP address that falls within the range of the configured filter, neither can a connection be made to the respective printer nor will it be displayed in the steadyPRINT Agent. Only an optionally definable exception (see figure - steadyPRINT Center - Connection Settings for Printer – column 6) allows the suspension of the IP filter for individual log in items (users, computers, groups and organizational units).
You can configure IP filtering for print servers, folders and printers (accessible over the corresponding tab settings of the respective view). Established IP filters automatically pass on their settings to the objects lying below until these objects are either overwritten or canceled.
Tip |
Location-based Printer Assignments |
|
Display your business locations in steadyPRINT Center in the form of folders and define the respective IP address areas. On the basis of IP filters, you then let the printers be displayed and connected based upon their location. |
Setting Default Printers
Setting the default printer is done via the properties of the respective log-in item and is possible for users, computers, groups and organizational units. Additionally, steadyPRINT offers the possibility of defining a default printer for folders and print servers (accessible via the respective tab Settings of the respective view).
It is possible to define several default printers for every log in item. If this is the case, a selection dialog box automatically appears for the user. The user can then select a particular default printer from the defined printers.
Important |
Observe the settings for default printer performance |
|
Observe the setting options for the default printer performance in order to attain the desired configuration. |
The visibilities allow to show or hide printers in the Agent if a user changes to the view for connecting a new printer. In general, printer assignments remain unaffected of the visibilities. The following scenarios describe a possible setting:
Show printer for selected groups
The figure steadyPRINT Center - Scenario 1 for visibilities shows a configuration that initially suppresses the display of the printer for all users (group everyone). Only members of both groups Purchase or Sales can see the printer in the Agent. Other users are not able to see the printer in the selection of available printers.
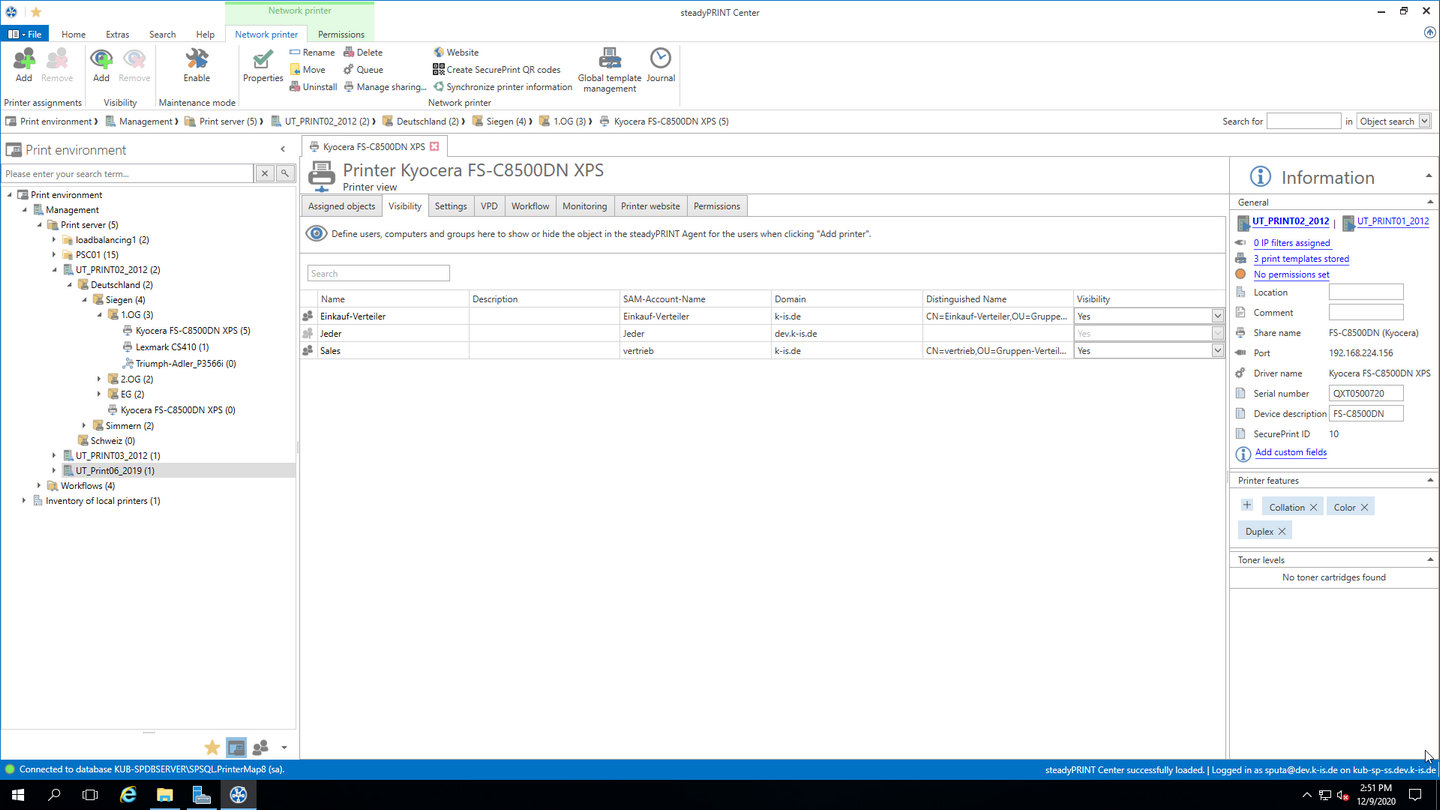 Abbildung 23: steadyPRINT Figure <%HMFIGURECOUNTER%: Center - Scenario 1 for visibilities
Hide printers for selected groups
The figure steadyPRINT Center - Scenario 2 for visibilities shows a configuration that allows all users (group everyone) the display of the printer in the selection of available printers. Only for members of the group visitor the printer is not visible in the Agent.
Figure <%HMFIGURECOUNTER%: steadyPRINT Center - Scenario 2 for visibilities
Inheritance of visibilities
Analogous to the printers, the visibilities can also be defined on print server folder-, print server- and folder level. An automatic inheritance to the subordinated printers is carried out. An inheritance can be deselected by adding an AD object on a subjacent level.