Set-up(Last update of this topic: 03-30-2023) |
  
|
(Last update of this topic: 03-30-2023)
Set-up(Last update of this topic: 03-30-2023) |
|
In order to set up SecurePrint for operation, the license has to be activated first. Then user roles have to be assigned and if the use of printer terminal devices is desired, they have to be connected to the printers.
Set up users for SecurePrint
In order to set up users for SecurePrint, you have to switch to the steadyPRINT WebCenter. Here, the roles for the SecurePrint users must be defined. For this purpose, the user changes to the settings and then to the administration of roles. Here, the desired users are already listed, in case they have already tried to log in, or the user creates a new user via the plus icon. SecurePrint users have to have the role: Admin oder SecurePrint besitzen.
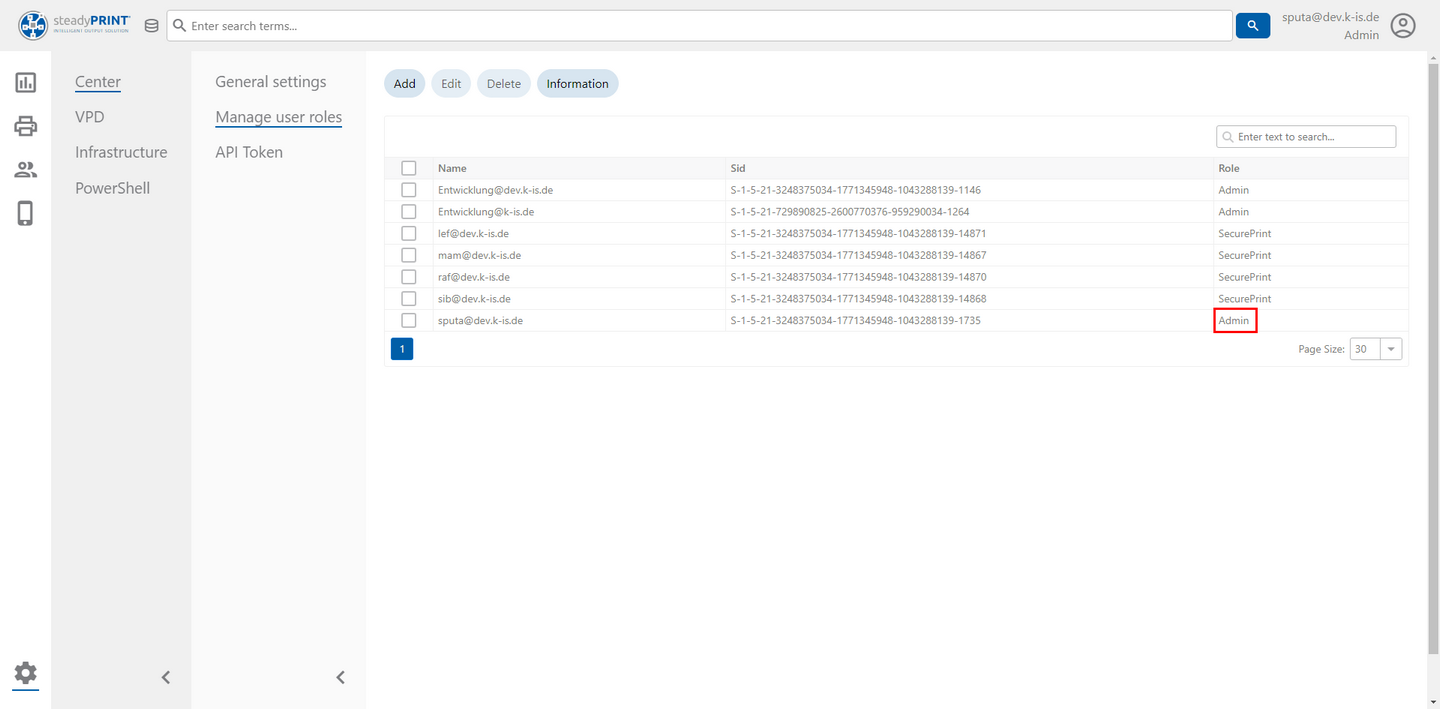
Figure 60: WebCenter Role Administration
If a user has the role provided for SecurePrint, he will be found under the menu item SecurePrint => user. New users can be added from the Active Directory under Add user. Here, the user can also be adjusted or certain settings can be reset, as e.g. a blocked PIN which can be unblocked here after three invalid entries. Moreover, the link to the SecurePrint App can be forwarded to the user by e-mail via the Action button. This is done by selecting the user and clicking the link Roll out BYOD-App.
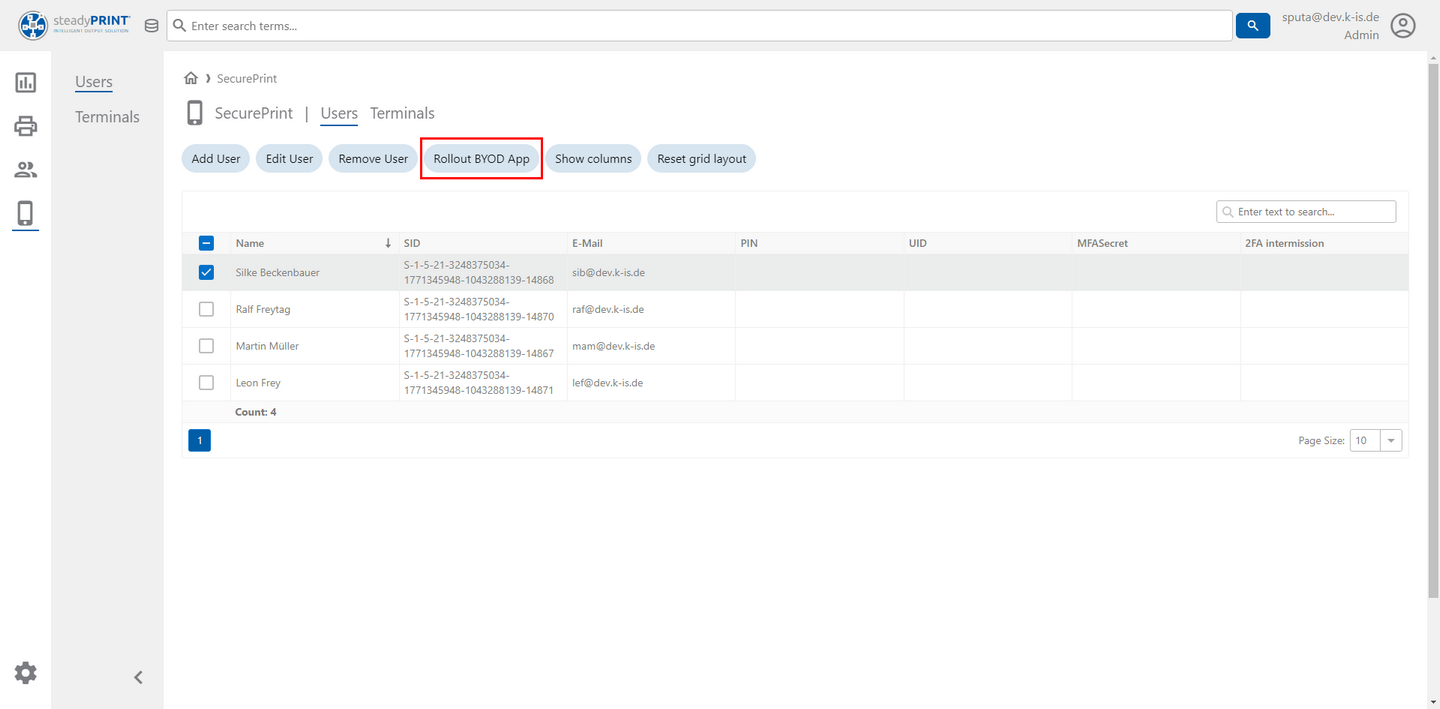
Figure 61: WebCenter - Create SecurePrint User
By selecting the stored e-mail profile (see chapter: E-Mail Profiles), a corresponding e-mail will be forwarded to the user.
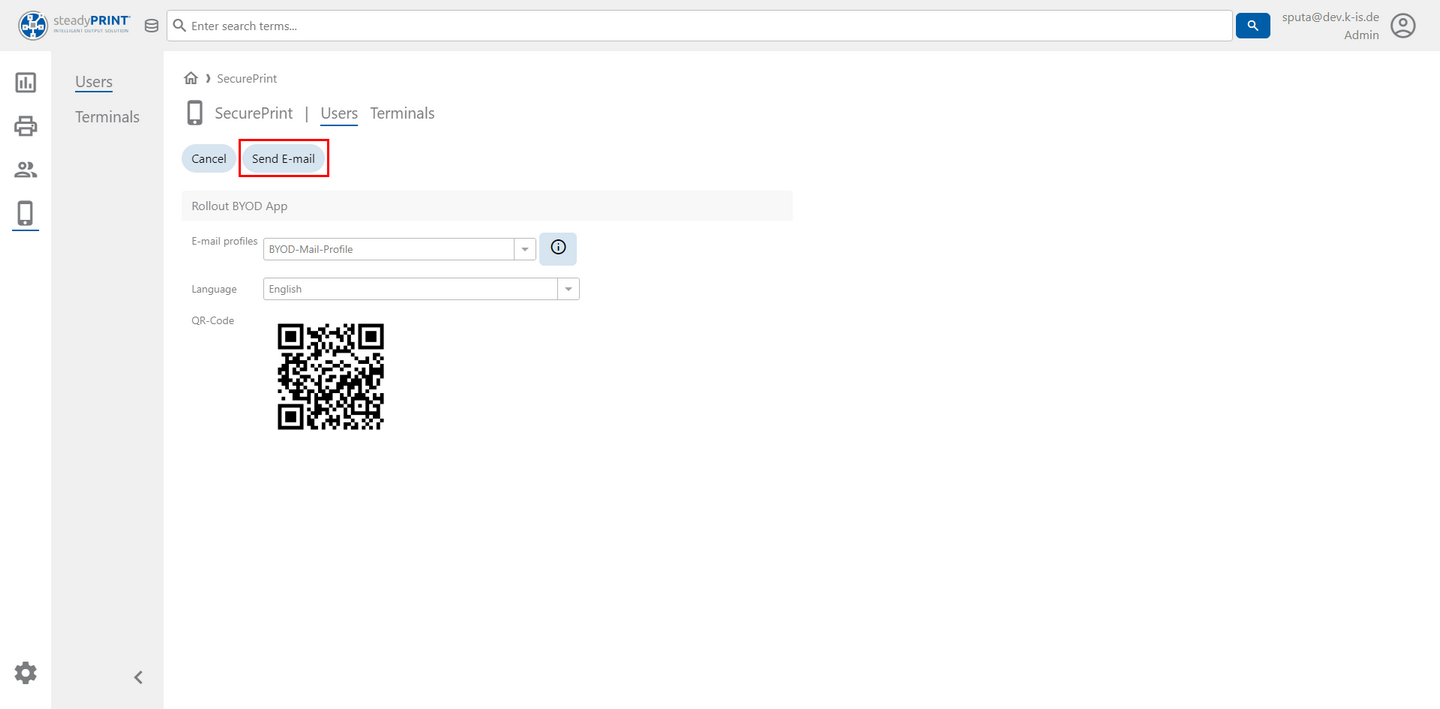
Figure 62: WebCenter - Distribute SecurePrint App
This e-mail is as follows and by clicking the link or scanning the QR code with your smart phone, the correct URL to the hosted SecurePrint App will be accessed.
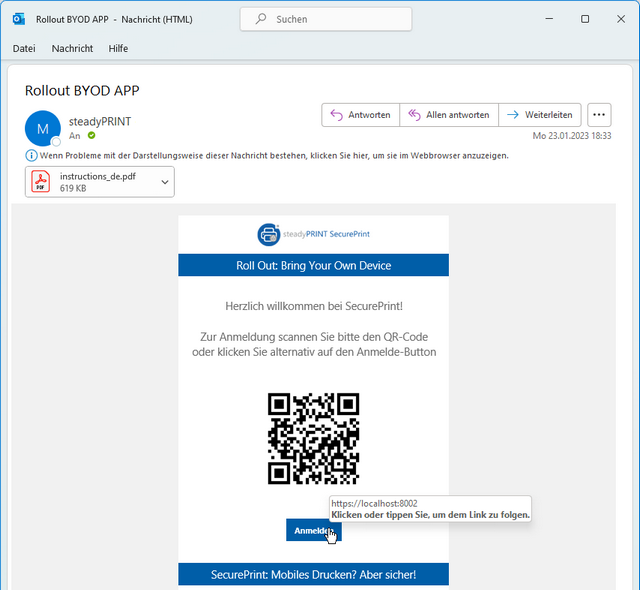
Figure 63: WebCenter - SecurePrint App Rollout Mail
„Printer Terminal“ - set up devices
New terminal devices can be set up and virtually linked to one or several printers under the menu item SecurePrint => Terminals. For this, an explicit name has to be given first. Then the QR code is displayed which contains the explicit link to the appropriate SecurePrint App. Then, one or several printers can be added (for application in a print room).
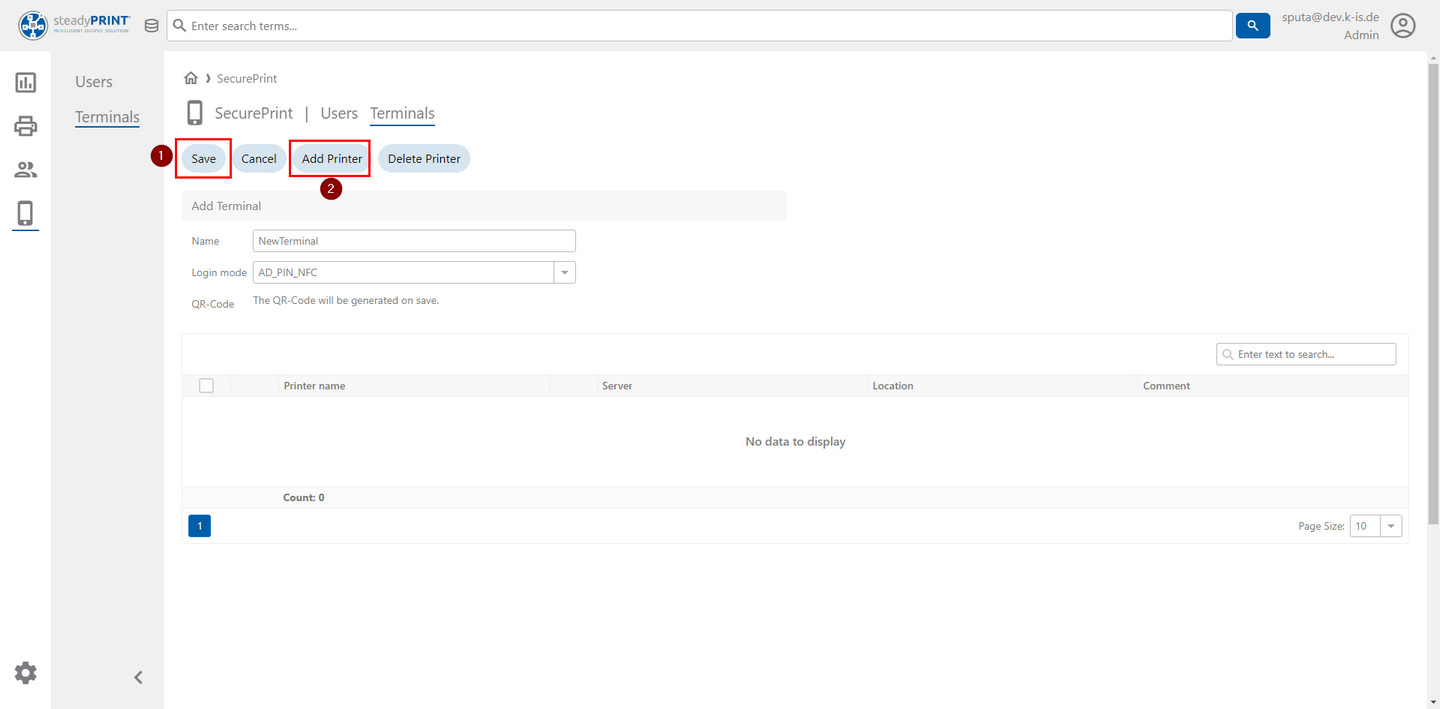
Figure 64: WebCenter - Set up terminal
After that, the link to the correctly hosted SecurePrint App can also be forwarded to any e-mail address. The respective e-mail address is also to be stored under an e-mail profile (see chapter: E-Mail Profiles). The e-mail for the terminal is then similar to the e-mail for the BYOD App, but with a correct link.
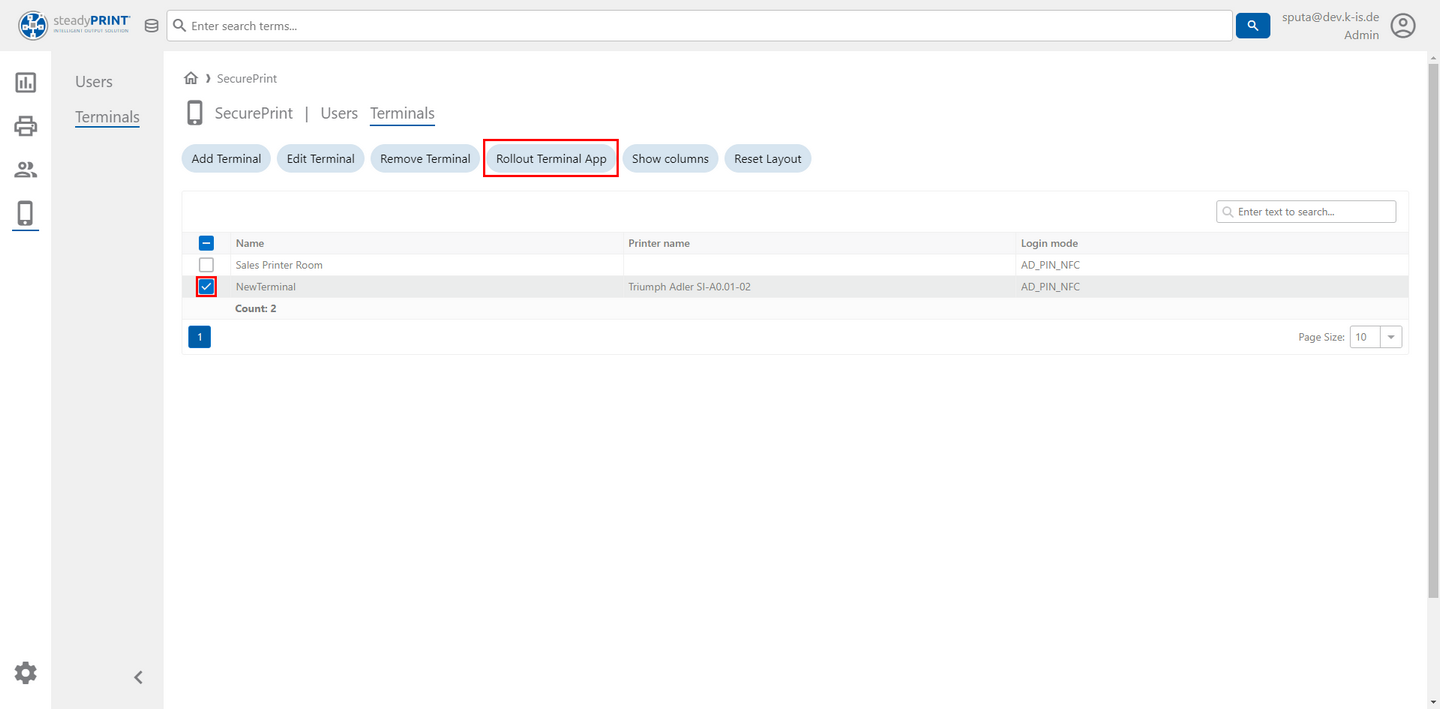
Figure 65: WebCenter - Roll out terminal app
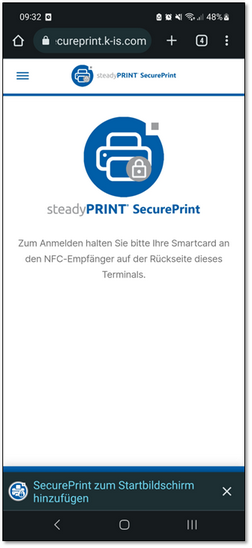
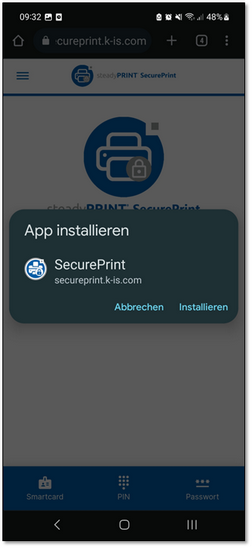
Installation of the SecurePrint App
When the link to the SecurePrint App is called up (whether Printer Terminal or BYOD device), the user has the option to always access the app in the browser or to install the app (Progressive Web APP – PWA) in the smartphone and to use it as a normal app. Shortly after calling up the app the message Add SecurePrint to Home Screen will be displayed at the bottom of the screen. If the user clicks this message, SecurePrint can be installed as an app. A custom icon will then be created so that the SecurePrint App can always be accessed.
|
|
Figure 66: Installation PWA
Printer Terminal - Set devices in Kiosk mode
In order to avoid that the Printer Terminal is arbitrarily changed, it should be set to the kiosk mode. On Android, the kiosk mode is also called Window Pinner. To enable it, navigate through the following sections in the Android settings:
| 1. | Biometric data and security |
| 2. | Other security settings |
| 3. | Enable the function: Pin window |
| 4. | As an alternative, the user can enable the option Request PIN before unpinning for reasons of security. |
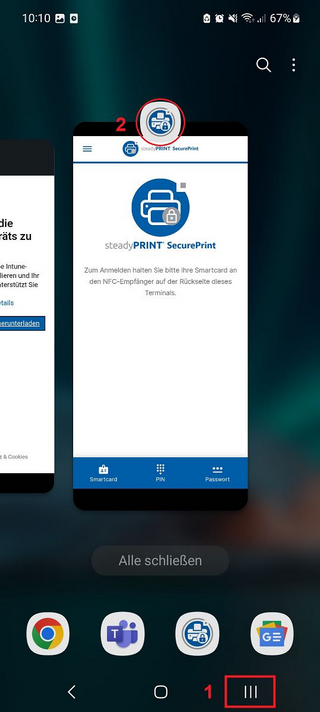
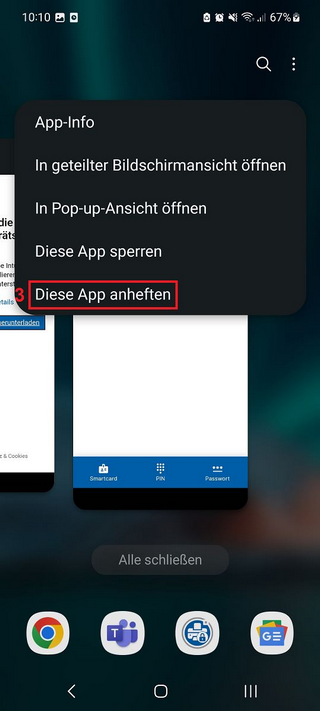
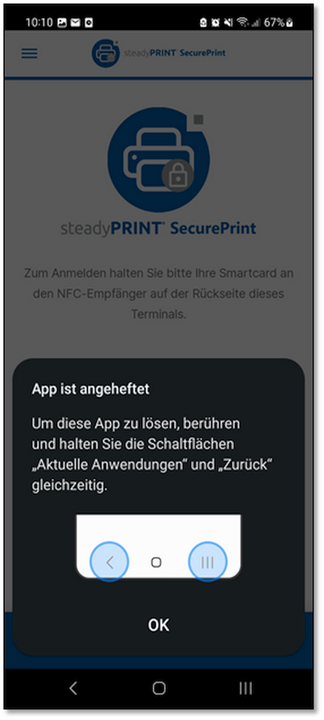
By clicking the button Current application (see 1 in the following figure) and a subsequent click on the SecurePrint icon (see 2), the menu with the enabled function Pin this App appears (see 3). When this function is enabled, the app is pinned and can only be disabled again by simultaneously using the hot keys: Current application and Back.
Figure 67: Set up Kiosk mode