Reporting Profile(Last update of this topic: 02-15-2021) |
  
|
(Last update of this topic: 02-15-2021)
Reporting Profile(Last update of this topic: 02-15-2021) |
|
You will find your profiles for the automated sending and/or saving of reports under Report Profiles. Here, you have the option to create different reports which will automatically be sent and/or saved at defined intervals.
Several profiles can be created which are run on the configured steadyPRINT Servers.
A new profile can be created via Add. An already existing profile can be copied by clicking Duplicate or adjusted via Edit. By clicking Delete, the profile is removed. (see figure Overview of reporting profiles).
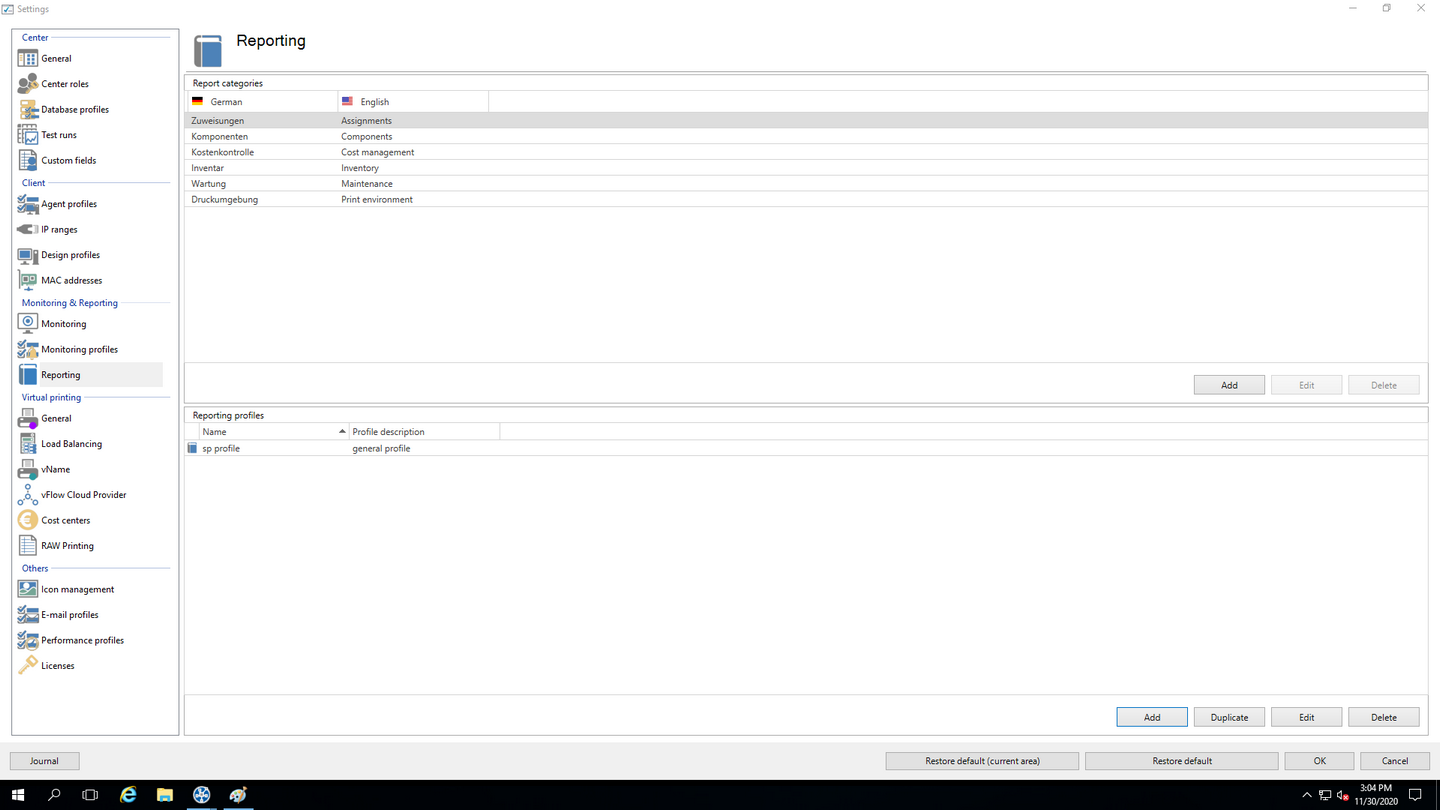
Figure 149: Overview of reporting profiles
Create a new Profile
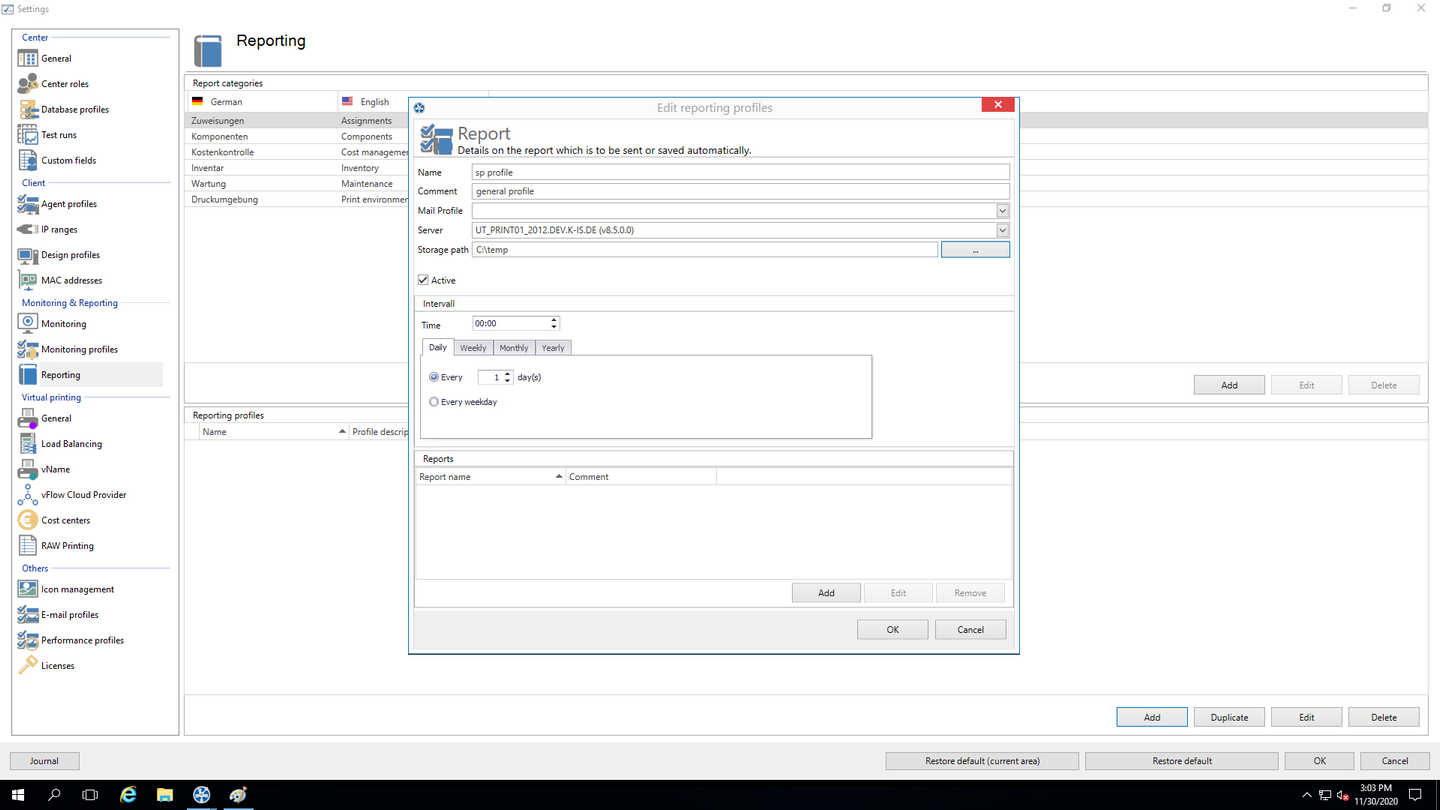
Figure 150: Create a reporting profile
A Reporting Profile contains some mandatory fields that have to be filled. Those fields are marked with a *. (see figure Create a reporting profile).
Important |
Saving the Profile |
|
By clicking OK, the adjustments are saved. |
Profile description:
Use the mandatory field Name to give the reporting profile a name. This name does not have to be unique.
The field Description describes the reporting profile.
The check box Active enables or disables this profile.
The settings for sending/saving the reports:
The selection list E-Mail Profile specifies which e-mail profile shall be used for sending reports. If the reports are only to be saved, this field can be left blank.
Via the Edit button next to the selection list, the e-mail profiles can be edited or new ones can be added.
The selection list steadyPRINT Server is a mandatory field that specifies on which server the automatic reporting is to be created. This is especially interesting when the automatic reporting is installed at different locations with different authorizations, e.g. to the memory shares.
The field Storage Path indicates where the reports are to be stored. This can be a share or a local path on the server. If this field is left blank, the reports will not be stored but only sent.
Important |
Send or save |
|
Either the e-mail profile or the storage path has to be indicated. |
The mandatory field Date indicates at which time the automated reporting is to be created. First, a certain time has to be chosen.
Then you can select whether this time should be on a daily, weekly, monthly or annual basis. Each selection presents a further selection for a certain point in time or day. This selection is similar to the Outlook appointment series.
Reports which are to be sent/saved automatically: (see figure Adding a report to the reporting profile)
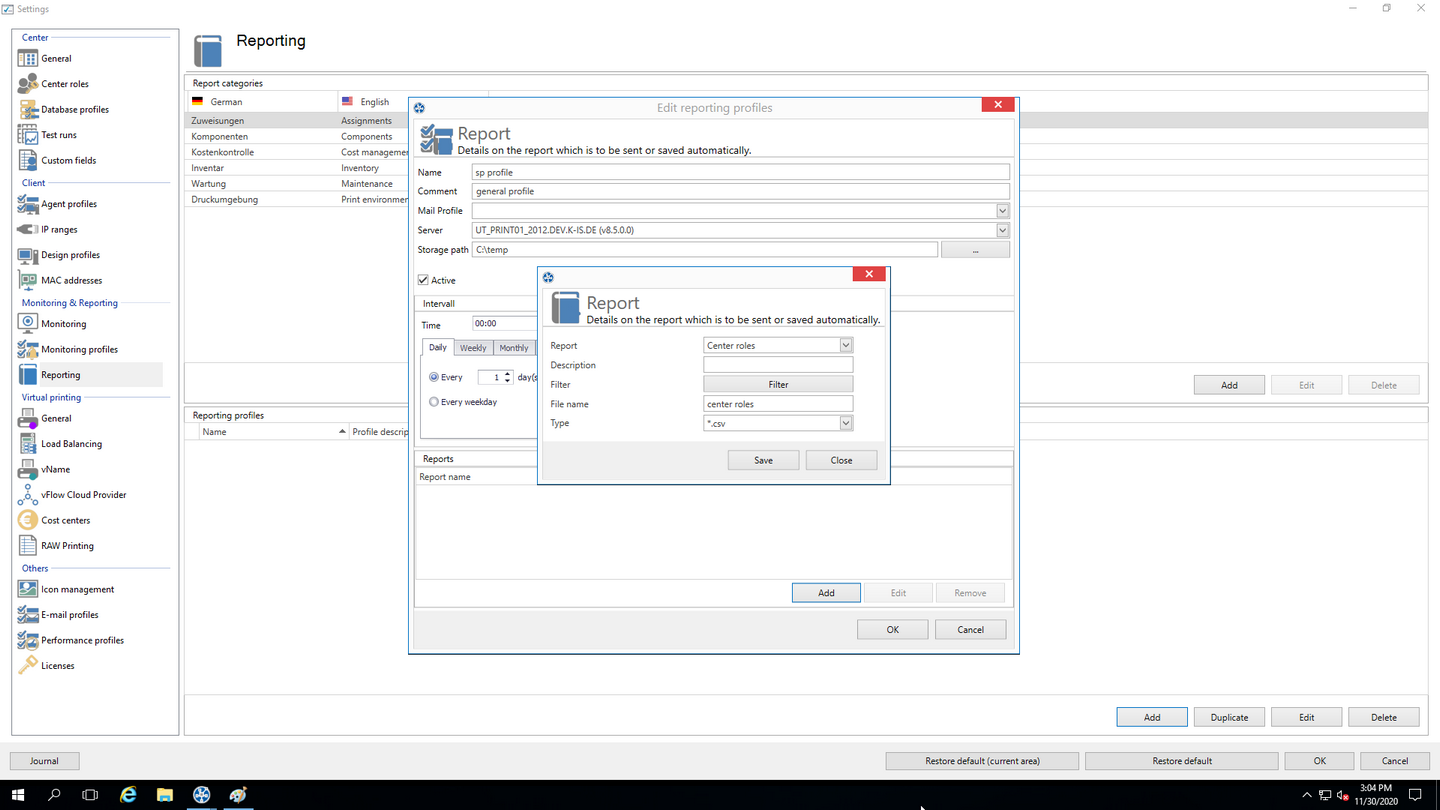
Figure 151: Adding a report to the reporting profile
With the mandatory field Report you select the report which is to be sent and/or saved.
The file Description contains a description text of the report.
The data can also be filtered, as in the steadyPRINT Reporting. It is possible to filter the data by the data filter or a date range. Even the top-selection is possible.
The mandatory field File Name indicates the name of the file which is to be saved and/or attached to the e-mail.
The mandatory field File Format indicates the format of the file.
The button OK imports the setting for the report.