Print Server Administration(Last update of this topic: 02-15-2021) |
  
|
(Last update of this topic: 02-15-2021)
Print Server Administration(Last update of this topic: 02-15-2021) |
|
To administer print servers and printers with steadyPRINT, it is first of all necessary to integrate them into the steadyPRINT Center. This is done by using the context menu of the administrative tool’s tree view (see figure - steadyPRINT Center - Setting up a new print server via the context menu).
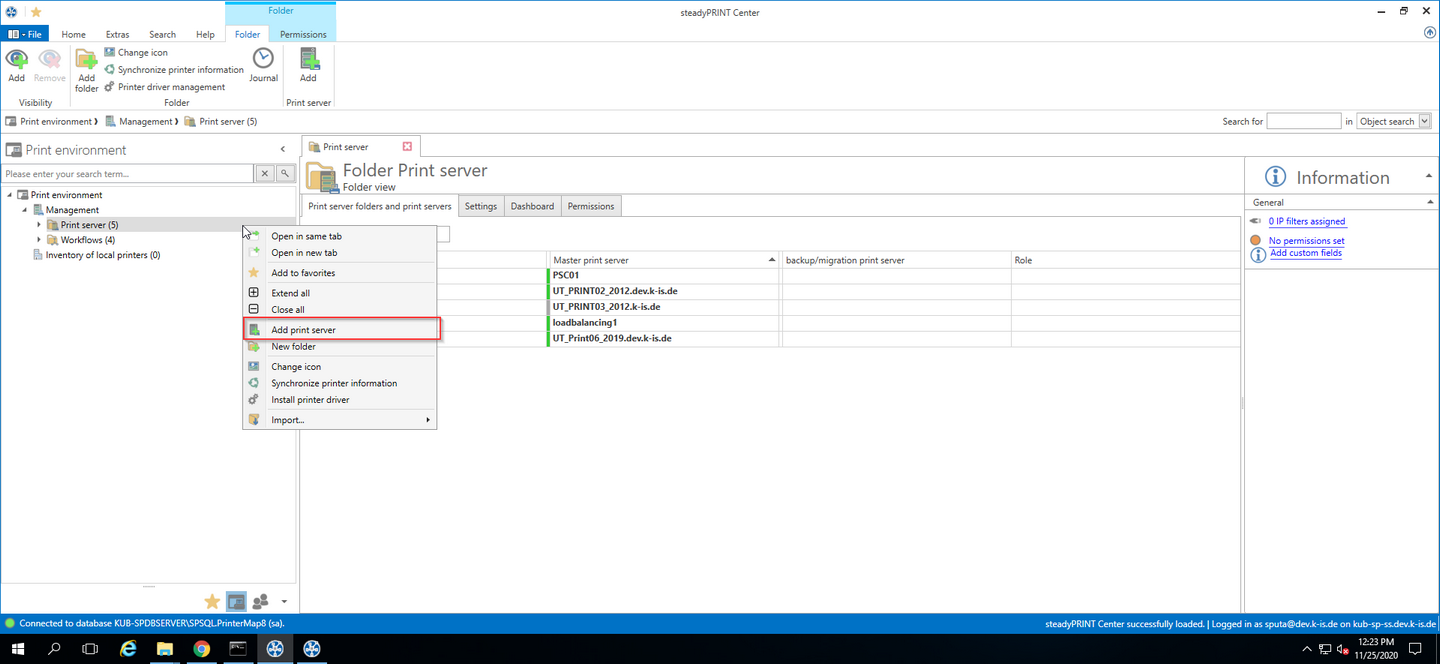
Figure <%HMFIGURECOUNTER%: steadyPRINT Center – Setting up a new print server via the context menu
Adding a print server in the required role is done via the tree node Branch Office Print Server and Print server.
Importing Print Servers and Printers
Now the name of a print server is entered in the window seen in figure - steadyPRINT Center - Importing a print server allowing its connected printers to be listed. Disabled print servers can be re-enabled here by entering the name (also see Disabling and Deleting Print Servers).
Note |
Importing a Disabled Print Server from the Database |
|
When importing please note that all existing printer assignments remain set to disabled ("locked") by default in order to avoid accidentally connecting printers to the Clients. Otherwise, these assignments would have a direct impact. |
To administer your printers with steadyPRINT, select them and then continue by clicking on the Import button.
Tip |
Organizing Printers in Folders |
|
Organize your printer environment in a clearly arranged folder structure. This can be done subsequently. |
After completing this action, the new print server with the selected printers appears in the tree view.
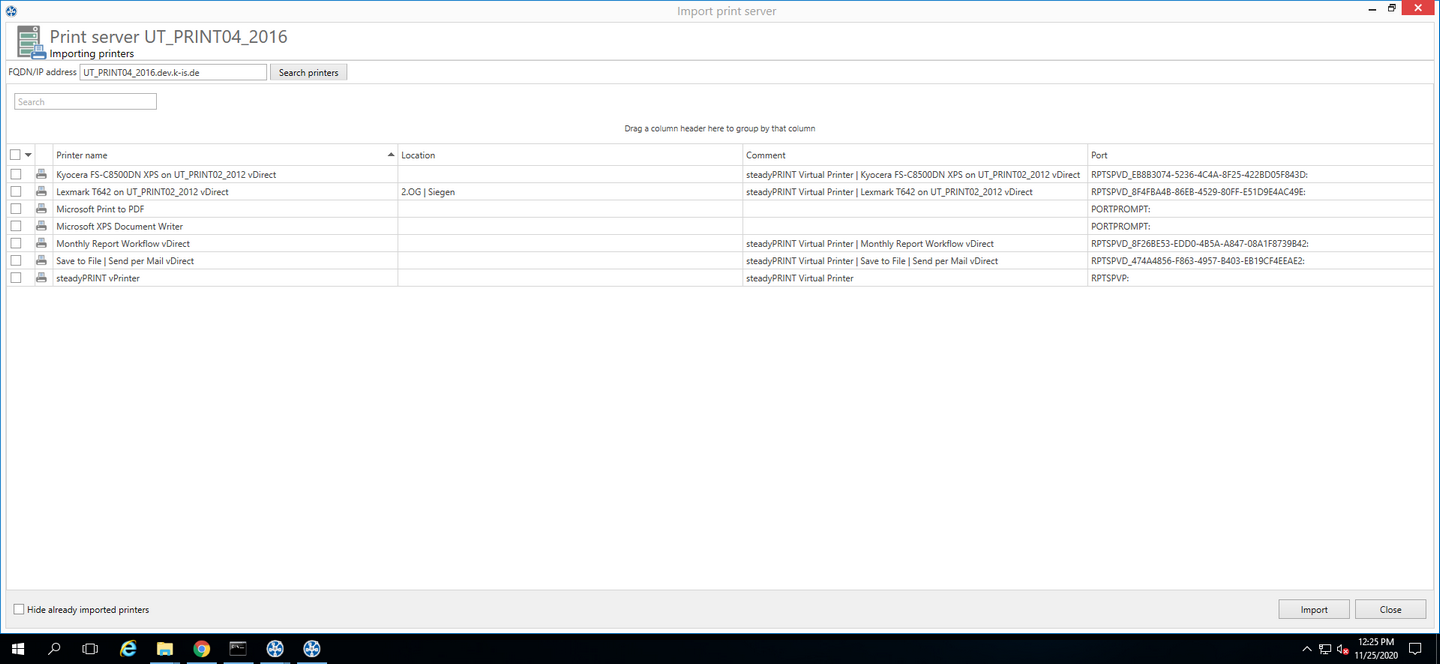
Figure <%HMFIGURECOUNTER%: steadyPRINT Center – Importing a print server
Note |
Import of Print Servers via CSV File |
|
Importing print servers can also be done via a CSV file. This way, for example, you can simply import your print servers and printers from an inventory to steadyPRINT. This procedure is described in chapter Import of print servers from a CSV file. |
Disabling and Deleting Print Servers
Removing a previously imported print server is possible using the context menu of the corresponding print server. By adding the check mark in figure - steadyPRINT Center - deleting a print server, you will erase the selected print server - with all its printers and their assignments - irrevocably from the database.
If this check mark is not set, the print server is only disabled and subsequently no longer visible in the steadyPRINT Center. If required, a disabled print server can be re-imported for further usage by stating the name, analogous to Importing Print Servers.
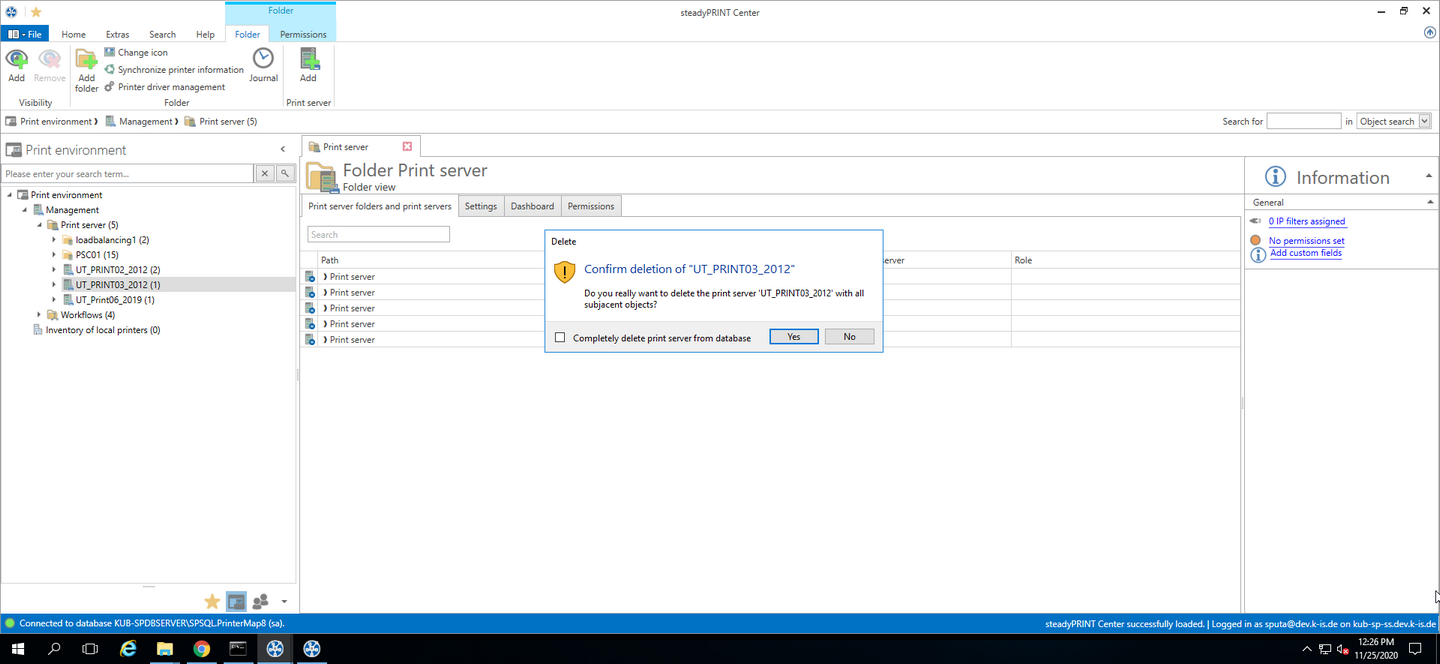
Figure <%HMFIGURECOUNTER%: steadyPRINT Center – Deleting a print server
Note |
|
|
Please note that only one disabled print server with the same name is allowed in the database. After disabling an additional print server, however, you can overwrite the existing one. |